Adding a node to a hierarchy
After you create a hierarchy in Usage Analyst, you add nodes to it using the Tree Builder tool. The nodes represent your organization’s divisions, departments, or other cost centers; they’re the children of the topmost node. Give each node a descriptive name and corresponding general ledger (GL) code (you can edit the node later if you need to).
You’ll need to assign accounts and services to the nodes; you can also split services between nodes to assign costs across multiple groups that share a service. When your organizational structure or reporting needs change, you can move nodes or remove branches (nodes) easily to reflect those changes.
Make the hierarchy you want to edit the active hierarchy when you sign in to Usage Analyst.
You can use hierarchies to structure your data to track your telecom use or spend across different groups and functions of your organization for more informed reporting and analysis:
- Review monthly telecom spend by business unit, division, department, group, or other segment of your organization; assign costs among groups that share telecom services.
- Use a hierarchy and its levels like data filters for your reports (in addition to standard and custom filters).
- Create multiple hierarchies to test and compare different reporting scenarios.
A hierarchy mirrors the structure of your organization—business units, regional offices, retail outlets, cooperatives, departments, and other reporting groups. The nodes and sub-nodes of a hierarchy form a tree structure, connected in parent-child relationships, representing your organization’s various groups. Split services between nodes to assign costs across multiple groups that share a service.
You can set a hierarchy you create as private (seen only by the person who created the hierarchy) or public (seen by all users in your organization).
Note: Some aspects of working with hierarchies are permission based. For example, you can only edit a node description, move a node to a different level, or remove a node if you are the owner or administrator.
To add a node to a hierarchy:
- Using the left menu, click Monitoring, click Voice Reports, then click Usage Analyst.
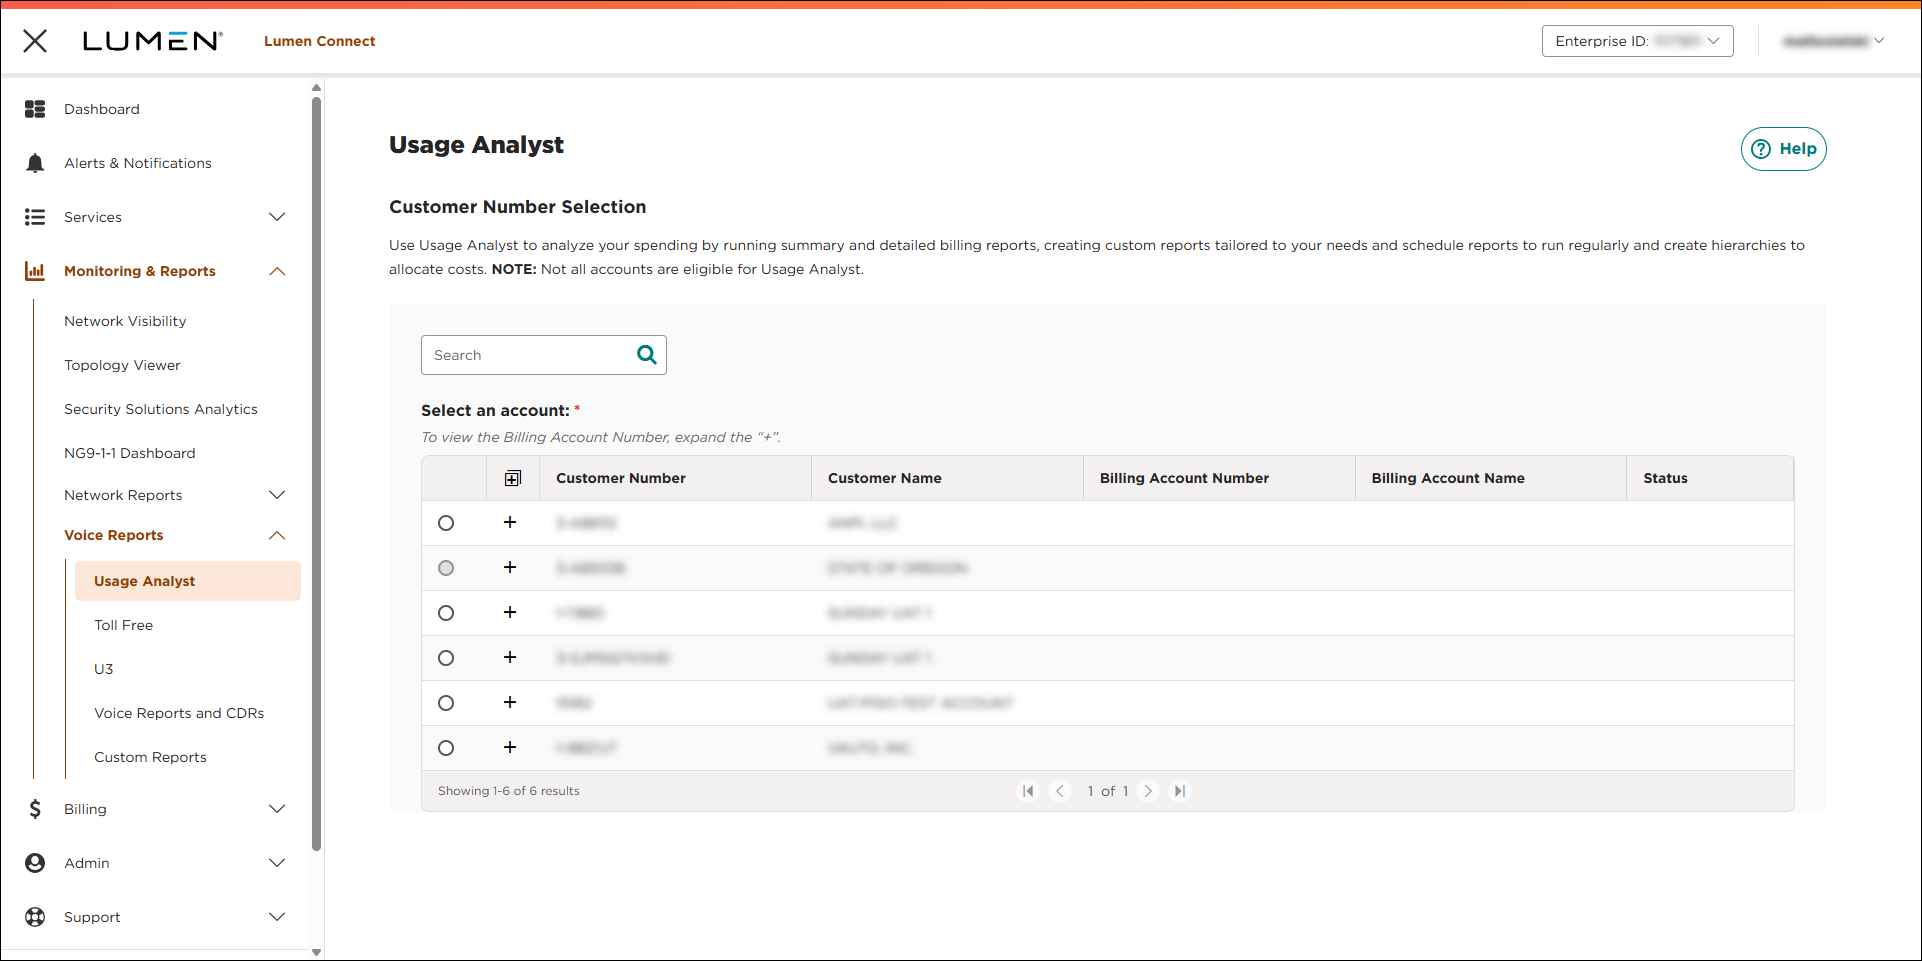
- Select the radio button next to the account you want to view, then click LAUNCH USAGE ANALYST.
Lumen Connect opens Usage Analyst in a new tab.
- Click the Setup tab.
- In the Hierarchies box, click Tree Builder.
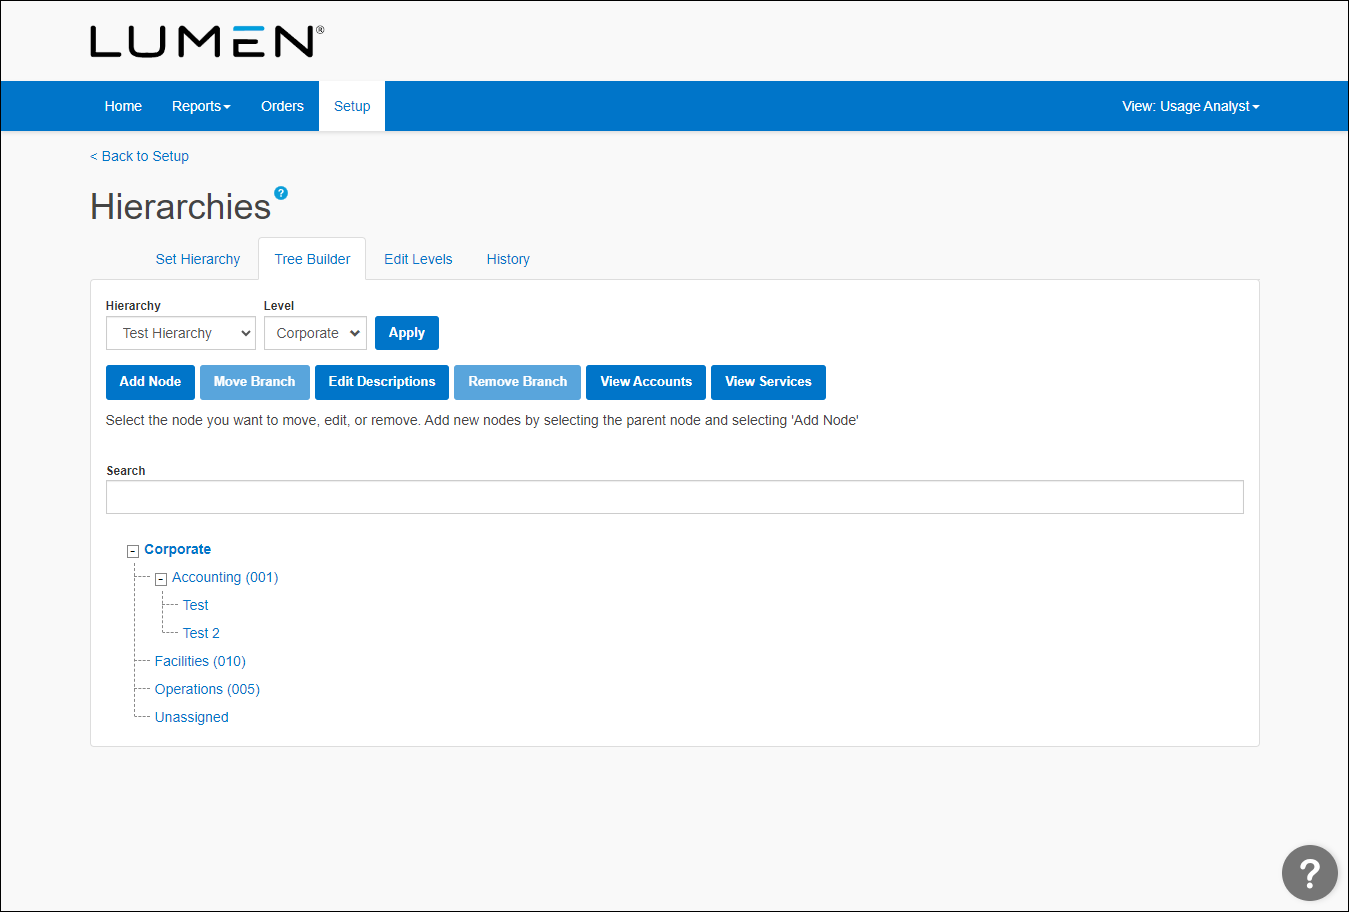
- Click the hierarchy node you want to add a node(s) under, then click Add Node.
- Add details for the node:
- In the Node field, type the top level department.
- In the GL code field, type the GL (general ledger) code for that department or division.
- Use the Description 1 and Description 2 fields to add descriptions for the node.
- In the Node field, type the top level department.
- Continue building your organizational tree by repeating step 7 for additional departments. (As you build out the tree, Usage Analyst also tracks a history of changes to the hierarchy.)
- When you're done, click Save.
Usage Analyst adds the node(s) to the hierarchy.


