Modifying a toll‑free call plan
The toll-free view and modify a call plan tool allows you to make changes to your switched and dedicated 8XX numbers in near-realtime. Use the following features to build and modify your call plan for wholesale toll-free numbers:
- DNIS
- DTO
- Super trunks (STG)
- In-switch overflow (ISO)
- Payphone blocking
- Alternate call plan
- Day-of-year routing
- Day-of-week routing
- Time-of-day routing
- Geo routing
- Percent allocation routing
Need to edit a call plan for an enterprise toll-free number? Learn how to manage a toll-free service
Note: You can use the View/Modify Call Plan tool to change 8XX from dedicated termination to switched termination and vice versa. This is only supported for 8XX on Wholesale Rebiller accounts. Wholesale Carrier accounts support only dedicated termination 8XX.
To modify a toll-free call plan:
- Find the toll-free number you want to edit the call plan for by doing one of the following:
- To access the toll-free number from inventory:
- You can search for a dedicated or switched 8XX number by product/service ID, or click Show Advanced Search and filter for Toll Free (then click Apply Search Filters).
- When you find the toll-free number, click the row for the number.
- You can search for a dedicated or switched 8XX number by product/service ID, or click Show Advanced Search and filter for Toll Free (then click Apply Search Filters).
- To access the toll-free number from Service Status:
- Click Orders, click Order Status, then click Service Status. (You can also click Monitoring, click Voice Reports, then click Service Status.)
- Enter the dedicated or switched 8XX number and retrieve it, then click the link for the toll-free number.
- Click Orders, click Order Status, then click Service Status. (You can also click Monitoring, click Voice Reports, then click Service Status.)
- To access the toll-free number from inventory:
The View/Modify Call Plan tool appears.
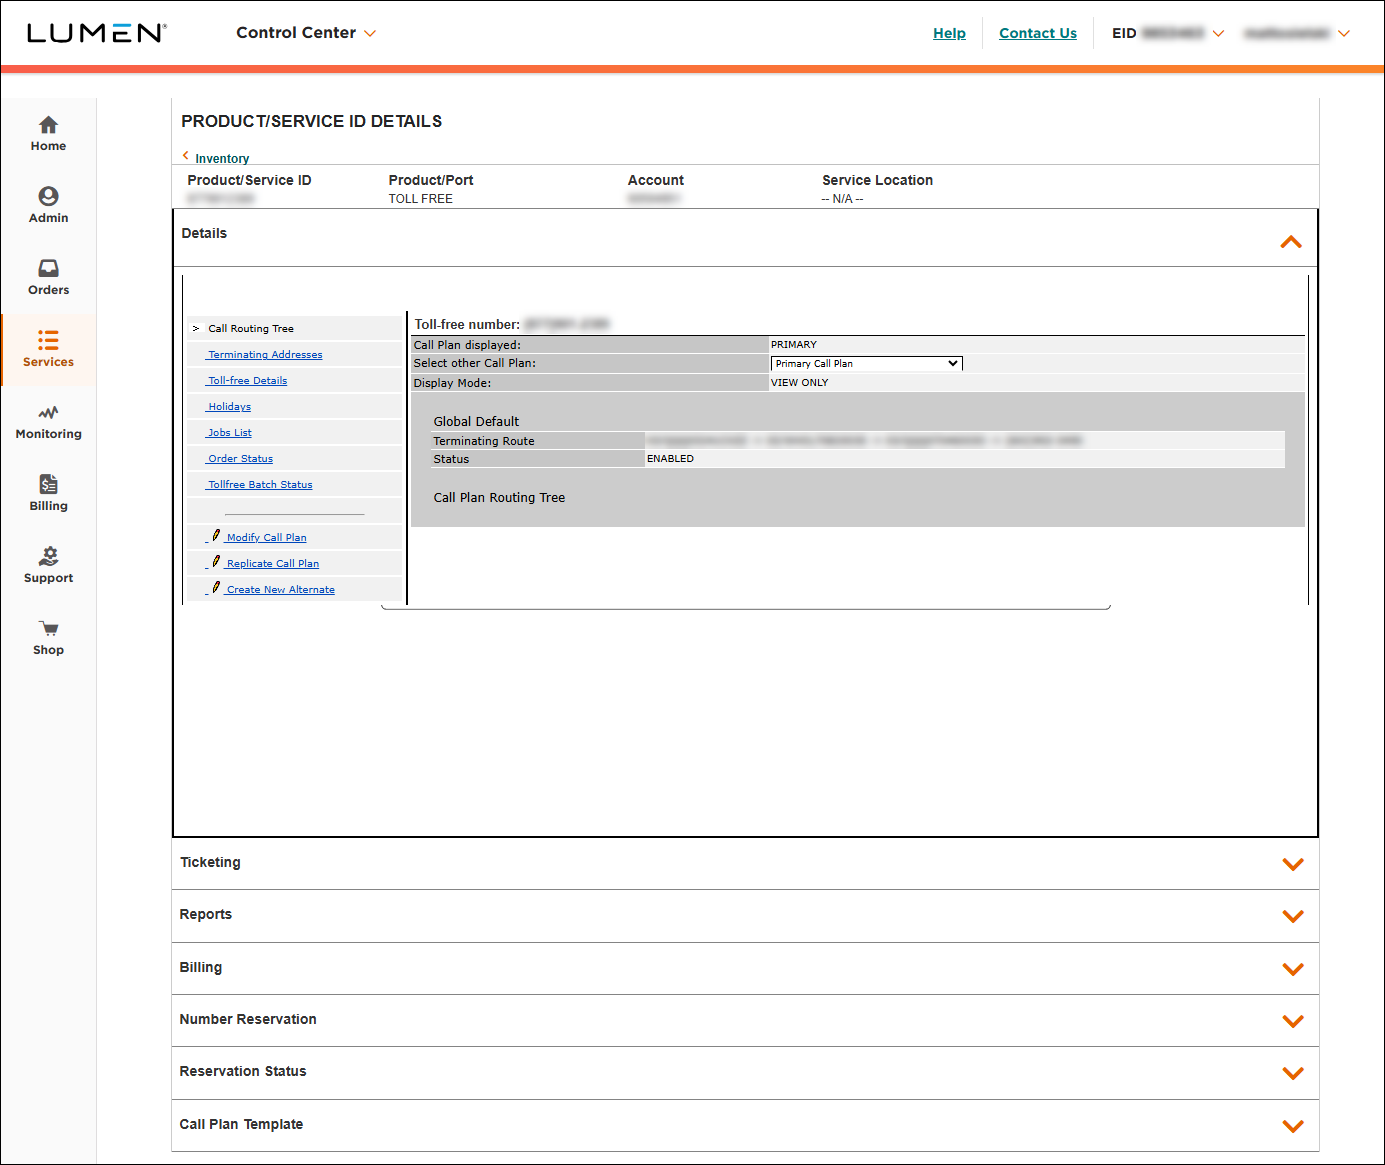
- Click Modify Call Plan.
- Click Toll-free Details.
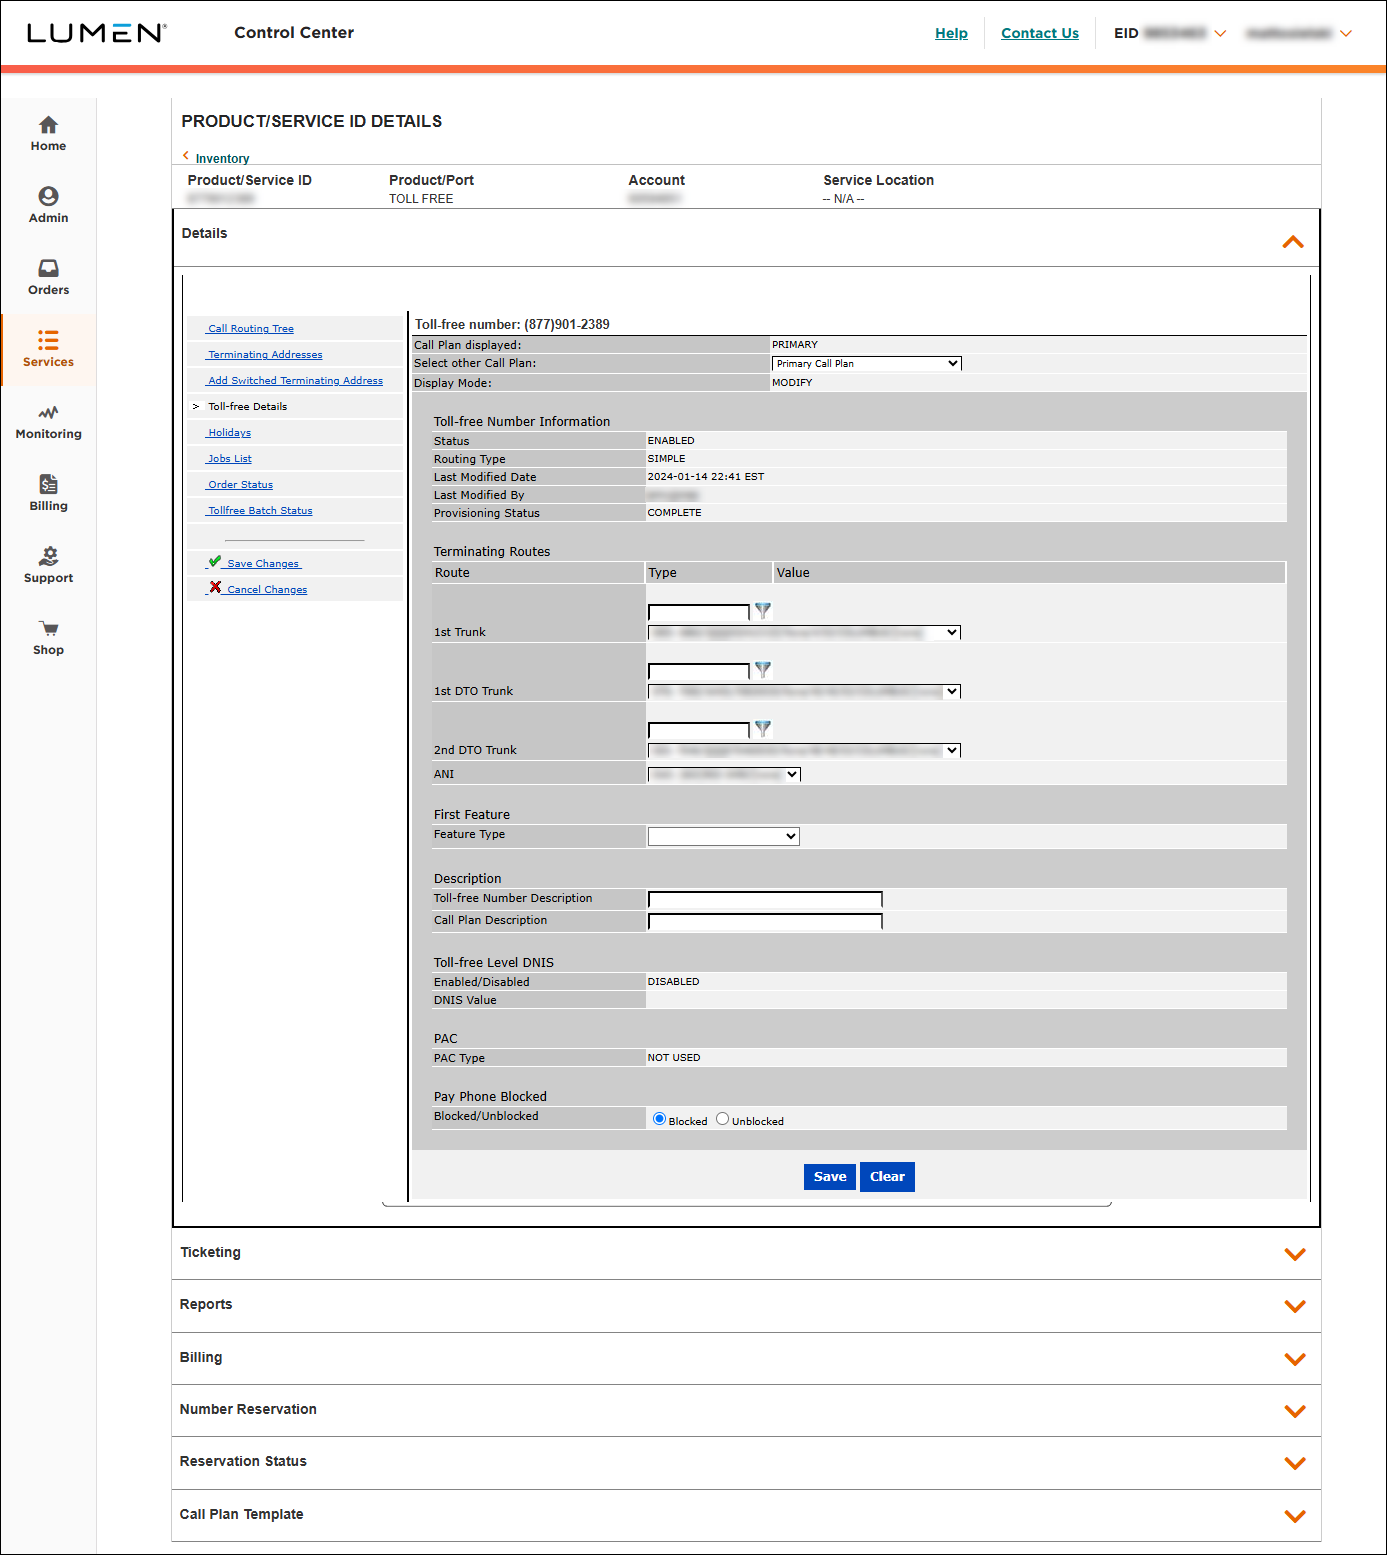
- You can select 1st Trunk, 1st DTO Trunk, and 2nd DTO Trunk from the lists. For the ANI field, you can use Add Switched Terminating Address to add an ANI, and it will display in the ANI field on the Toll Free Details page.
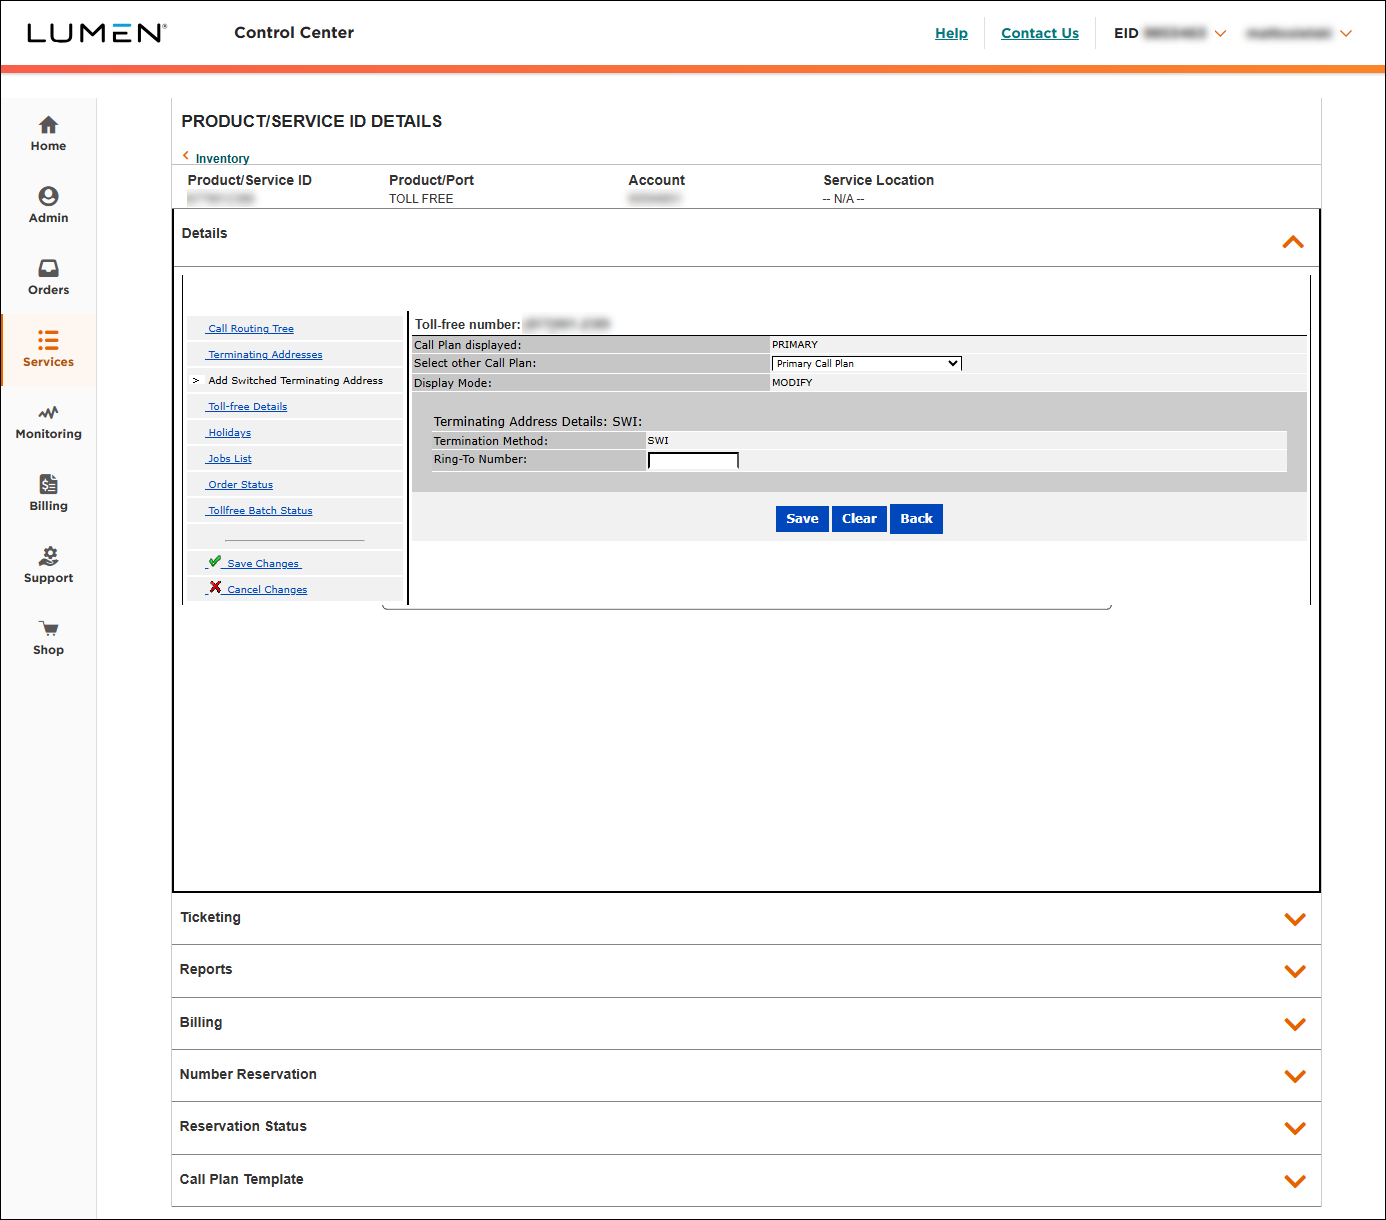
- Enter an ANI in the Ring‑To Number field and click the Save button below it.
The screen updates to the Terminating Addresses page to show the ANI that was added.
- If you need to change DNIS on trunk groups, you can do that on the Terminating Addresses page.
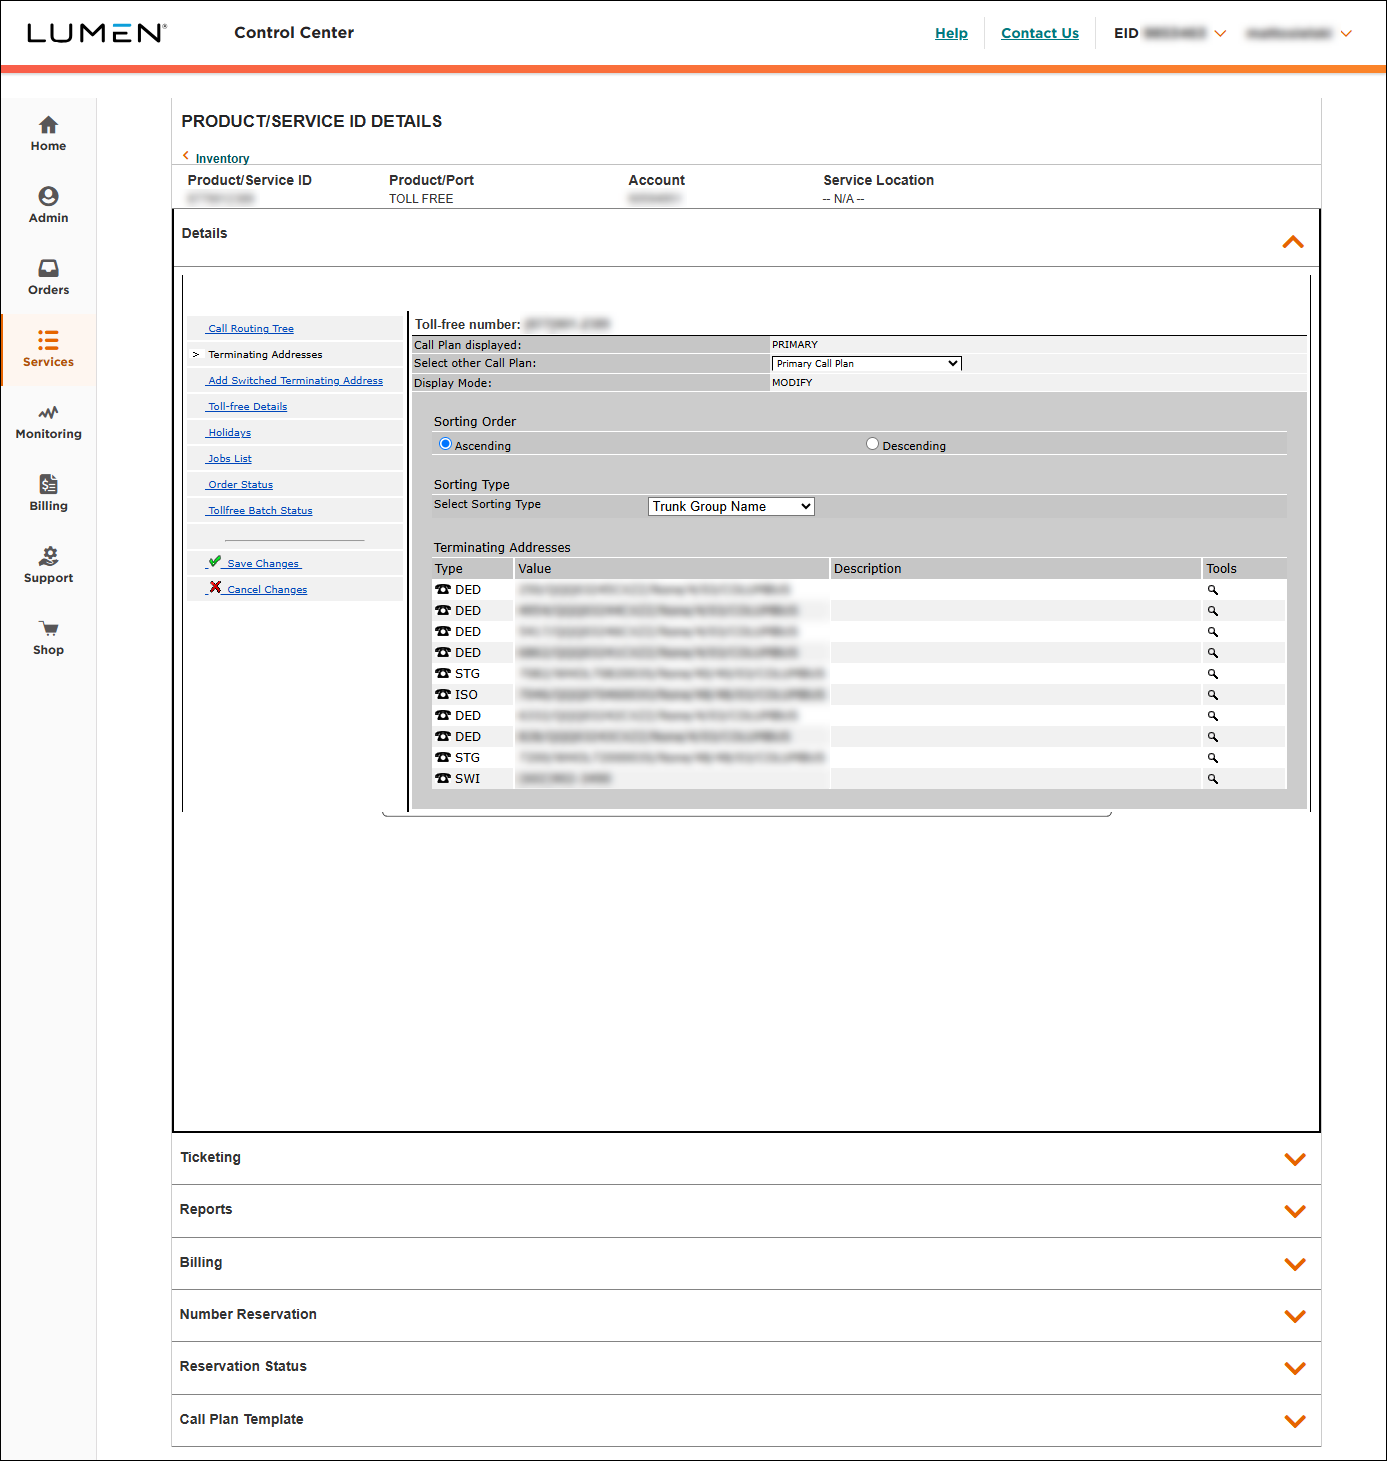
- To update the DNIS for a trunk group, click the magnifying glass icon under Tools on the right.
- Enter DNIS digits in the DNIS field, then click Save.
- If you've made changes in Add Switched Terminating Addresses or Terminating Addresses, click Toll-free Details.
- Make any changes to the terminating routes. If you've added a new switched terminating address, you can select it in the ANI field. If you have made DNIS changes in the Terminating Addresses > Details, you will see that DNIS displayed as part of the rows of available trunk groups, Super Trunk Groups (STGs) and In-Switch Overflows (ISO) in the trunk lists.
- Click Save.
Lumen Connect shows the Call Routing Tree tab.
- Click Save Changes.
Lumen Connect saves your changes.
Replicating a call plan
- Before submitting, you can add additional 8XX numbers in the Replicate Call Plan box.
Note: When replicating toll free call plans, DNIS (Dialed Numbered Identification System) may be changed on the Replicate Call Plans screen.
One option is to select the Use 8XX as DNIS checkbox; this will assign the toll‑free number as the DNIS digits for each toll‑free number in the order request.
Second option is to type the toll‑free number, type a comma, then the DNIS digits in the Toll Free Number text box.
- Click Submit.
Lumen Connect submits your changes and provides an order ID.
- To track the status of your request, click the link in the Request Status box.
Note: After submitting the call plan change, it will complete in a few minutes (The Lumen Wholesale service level agreement interval is <8 minutes.)


