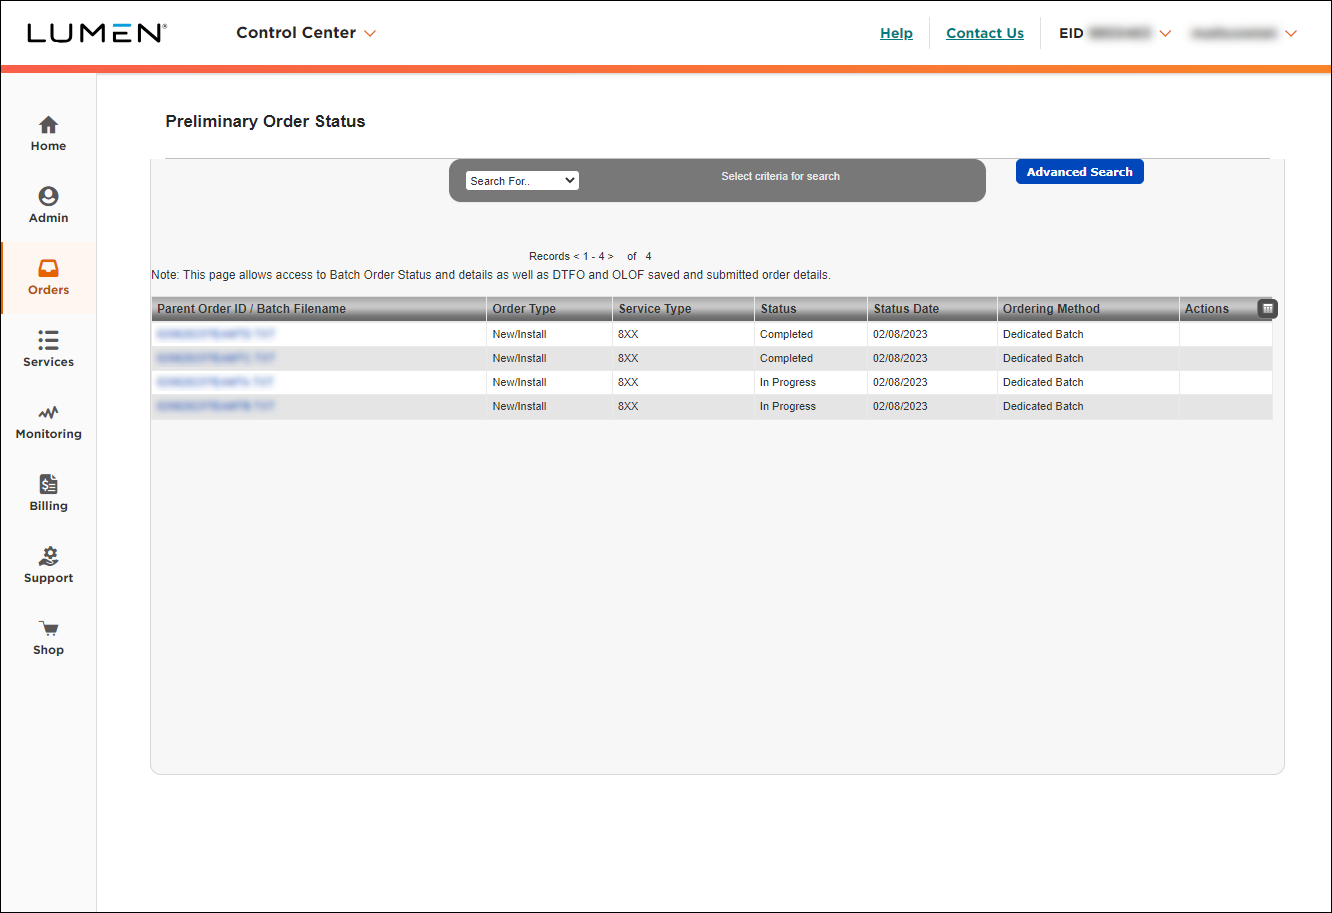
Using preliminary order status
Use preliminary order status to view progress on your Switched batch, Dedicated batch, and DTFO orders, look at View/Modify Call Plan changes, and access your OLOF orders in Lumen Connect.
For Dedicated 8XX batch, DTFO, OLOF, and billing address changes, use Post-Submission Order Status to view additional status.
To use preliminary order status:
- Using the left menu, click Orders, click Order Status, then click Preliminary Order Status.
Lumen Connect shows all pending orders and orders completed within the past 90 days submitted using dedicated/switched batch, DTFO, or OLOF (online order forms). Lumen Connect also lists your view/modify call plan changes.
Searching
After selecting one of the criteria in the Search For list, a field will appear to the right of the list. You can use the enter key on your keyboard, or click the >> icon to the right of the Search field, to launch the search/filter. To clear a search/filter and reload the default screen showing all orders from past 90 days, click Reset.
Use Search For… to filter your orders by parent order ID, product account ID, order type, service type, status, PON, account name, or ordering method.
For example, you would select Ordering Method in the Search for… list, then you could type Switched Batch, Dedicated Batch, DTFO, OnLine Order Form, etc.
The Search functionality is case sensitive. For example, type DTFO rather than dtfo. You can use asterisks for wildcard search. For example, searching On* will show OnLine Order Form orders.
The table illustrates Parent Order ID, Order Type, Service Type and Ordering Method for each ordering tool/type:
Ordering tool | Parent order ID | Order type | Service type | Ordering method |
Switched batch files | Switched batch file name | Always shows as New/Install, Change, or Disconnect | Always shows as 8XX, ANI, or Card | Switched batch |
Dedicated batch files | Dedicated batch file name | Always shows as New/Install (i.e. add—this functionality is add only) | 8XX | Dedicated batch |
DTFO | DTFO order ID number | New/Install (i.e. add), Change, or Disconnect (based on selection at start of DTFO order) | 8XX | DFTO |
View/Modify call plan | Batch ID number | Always shows as Change | 8XX | Dedicated/Switched batch |
OLOF | OLOF order ID number | New/Install (i.e. add), Change, or Disconnect (based on selection at start of OLOF order) | COL (Colocation) | Online Order Form (OLOF) |
Billing address change | n/a | n/a | n/a | n/a |
Advanced Search
To filter by more than one piece of information at a time, click Advanced Search. You can search by order date range, ID type, status, and type. To retrieve orders matching your criteria, click Apply. To cancel and return to the full list of orders, click Close.
Status
If status is selected, you can search for a Saved or Submitted DTFO or OnLine Order Form, or other status such as In Progress or Completed:
- Switched and Dedicated Batch: In Progress, Submitted, Completed, Failed
- DTFO: Saved, Submitted (or Failed if all 8XX error out)
- View/Modify Call Plan: In Progress or Completed
- OLOF: Saved, Submitted, or Failed
Sorting and customizing your view
By default, Lumen Connect shows the following columns:
- Parent Order ID / Batch Filename—the internal Lumen order number or batch filename
- Order Type—the order action
- Service Type—the product
- Status—In Progress, Cancelled, or Completed (varies by service type—see above)
- Status Date—the date the order moved into the status shown
- Ordering Method—the ordering tool used
- Actions—shows icons for any actions that can be taken on the order, such as View Saved Order, View Submitted Order, or Create Template from Order
You can customize your view by doing any of the following:
- To sort using a column, click the column heading.
- To customize the columns shown, click the Customize Columns icon ():
- To add a column to the view, move the column from the Available Columns list to the Current Columns list.
- To remove a column from the view, move the column from the Current Columns list to the Available Columns list.
- To adjust the order of the columns, use the Move Up, Move Down, Move to Second, and Move to Last buttons.
- To save your changes, click Save.
- To restore the default columns, click Reset.
- To add a column to the view, move the column from the Available Columns list to the Current Columns list.
Note: Lumen Connect keeps your settings until you clear your browser cache.


