Creating an install order for Local Inbound
After you reserve phone numbers for Lumen® Local Inbound service, you can submit an install order to have those phone numbers added to your service using Control Center.
To creating an install order for Local Inbound:
- Using the left menu, click Services, click Service Tools, then click ELS & LI Management.
- If you have more than one customer number on your enterprise ID, select the customer number you want to work with, then click PROCEED.
- Click the Install Order tab.
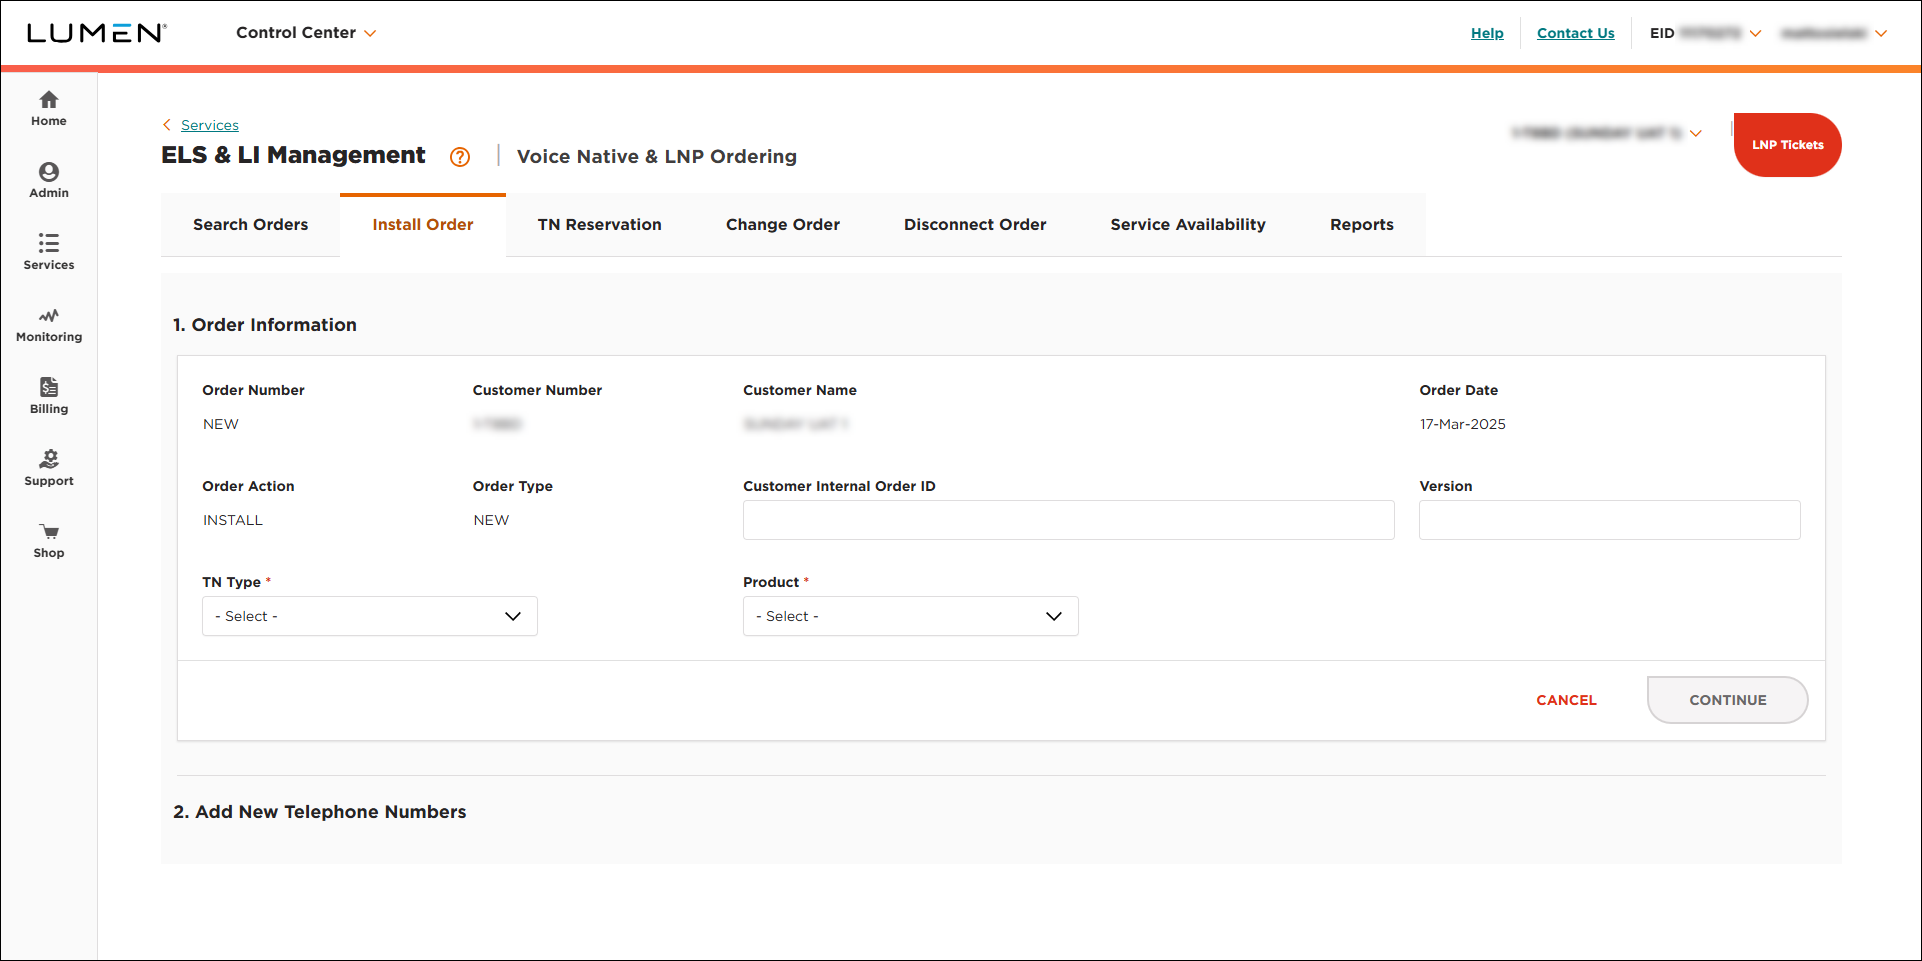
- Fill in the Order Infomation section:
- If you want to add an internal tracking number, type it in the Customer Internal Order ID field.
- If you want to add a version number to the order, type it in the Version field.
- From the TN Type list, Native.
- From the Product list, select LI.
- Click CONTINUE.
- If you want to add an internal tracking number, type it in the Customer Internal Order ID field.
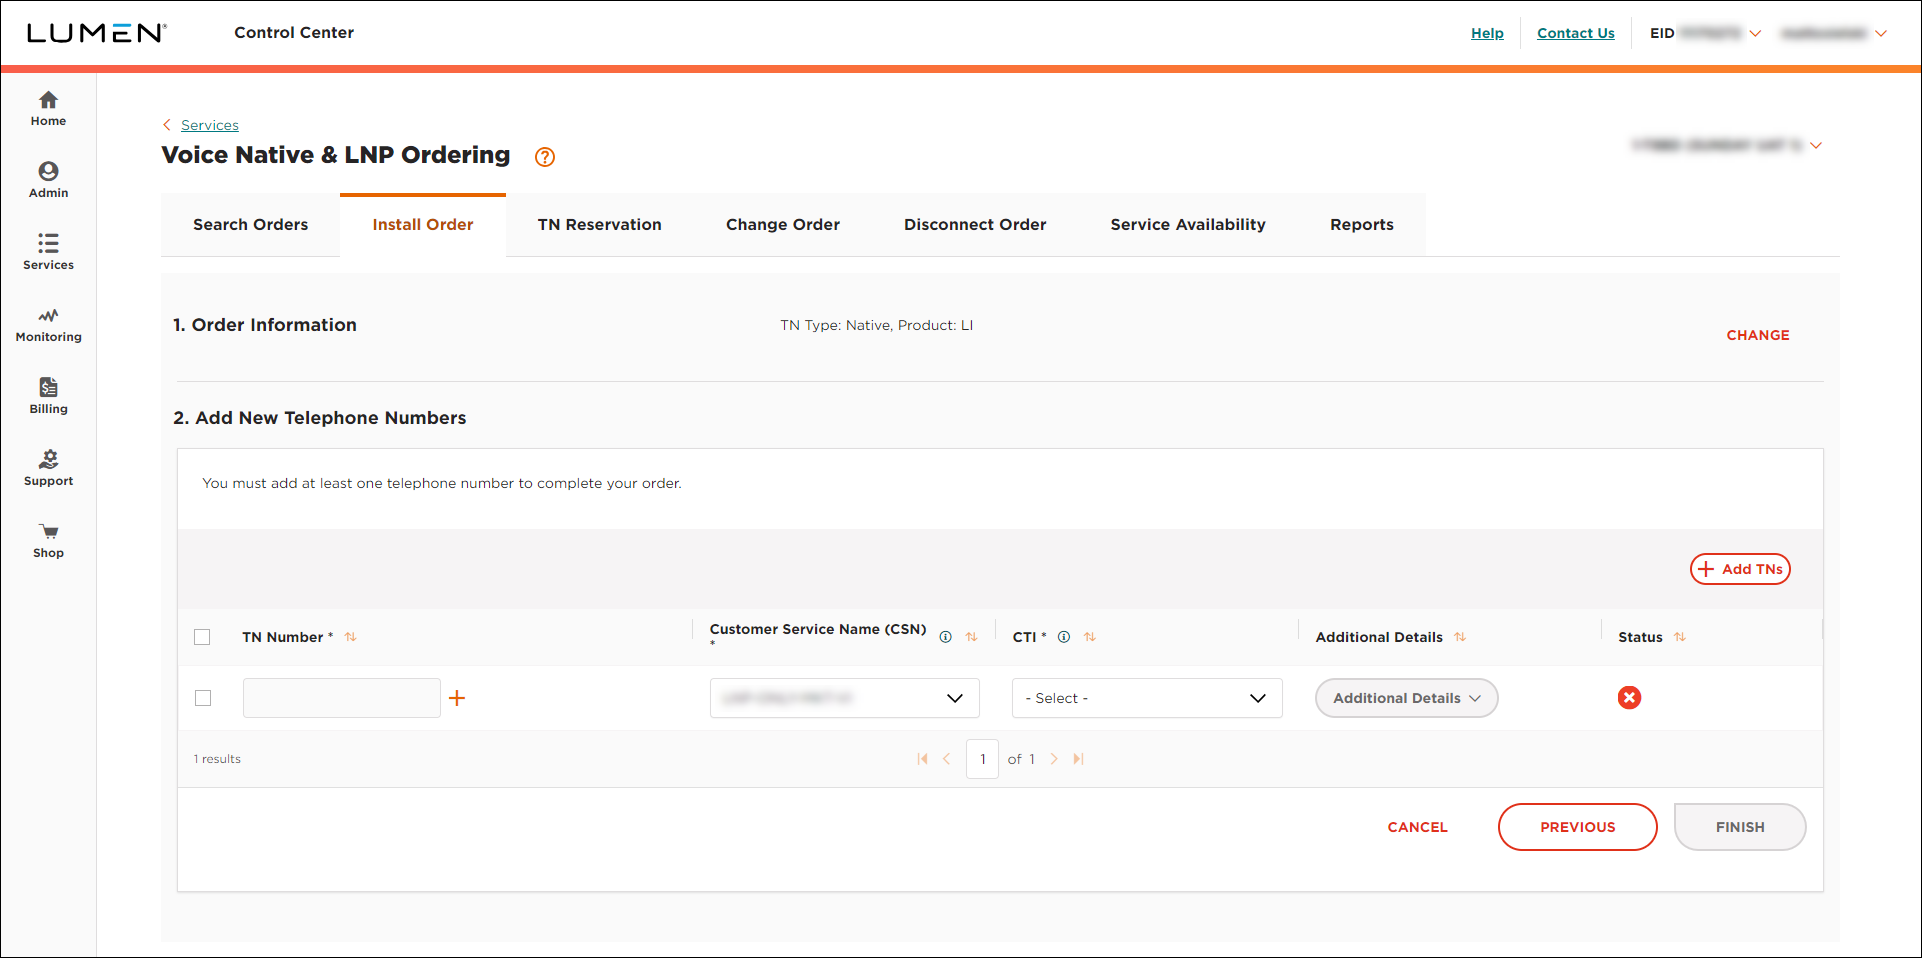
- Click the icon next to the TN Number field.
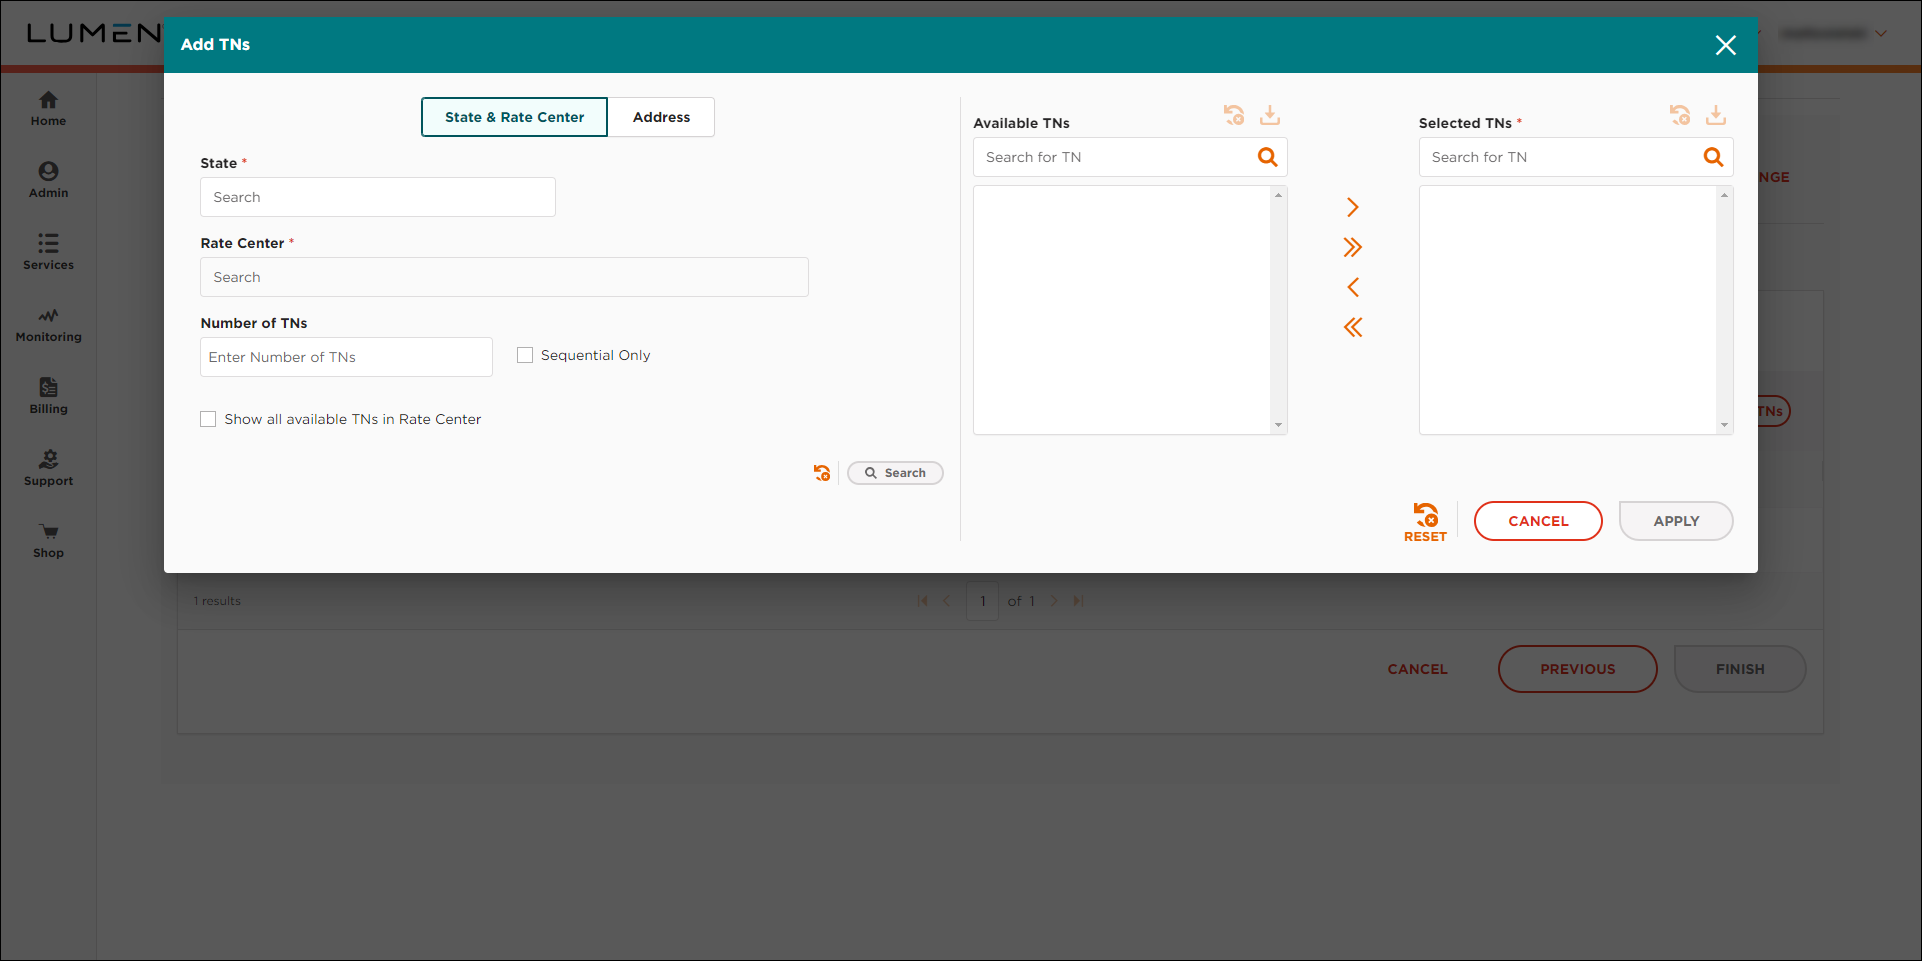
- Use the search fields on the left to locate the phone numbers you want to add to the order:
- To use the state and rate center to locate the rate center with available phone numbers, do the following:
- Type or select the state, then the rate center you want to locate phone numbers for.
- To see all available phone numbers in the rate center, select the Show all available TNs in Rate Center checkbox. Otherwise, type the number of phone numbers you want to use from the rate center. If you need sequential number, select the Sequential Only checkbox.
- Click Search.
Contol Center lists the phone number matching your search in the Available TNs field.
- To select all available phone numbers, click the icon to move the phone numbers to the Selected TNs field. Otherwise, select the phone number(s) you want to use, then click the icon to move the phone numbers to the Selected TNs field.
- When you're done, click APPLY.
- Type or select the state, then the rate center you want to locate phone numbers for.
- To use an address to locate the rate center with available phone numbers, do the following:
- Click Address.
- Use the fields to type the address, then click Identify Rate Center.
- To see all available phone numbers in the rate center, select the Show all available TNs in Rate Center checkbox. Otherwise, type the number of phone numbers you want to use from the rate center. If you need sequential number, select the Sequential Only checkbox.
- Click Search.
Contol Center lists the phone number matching your search in the Available TNs field.
- To select all available phone numbers, click the icon to move the phone numbers to the Selected TNs field. Otherwise, select the phone number(s) you want to use, then click the icon to move the phone numbers to the Selected TNs field.
- When you're done, click APPLY.
- Click Address.
- To use the state and rate center to locate the rate center with available phone numbers, do the following:
- From the Customer Service Name list, select the trunk group you want the assign the phone number(s) to.
- From the CTI list, select whether the phone number(s) is for residential or business use.
- From the Additional Details list, select Customer Information.
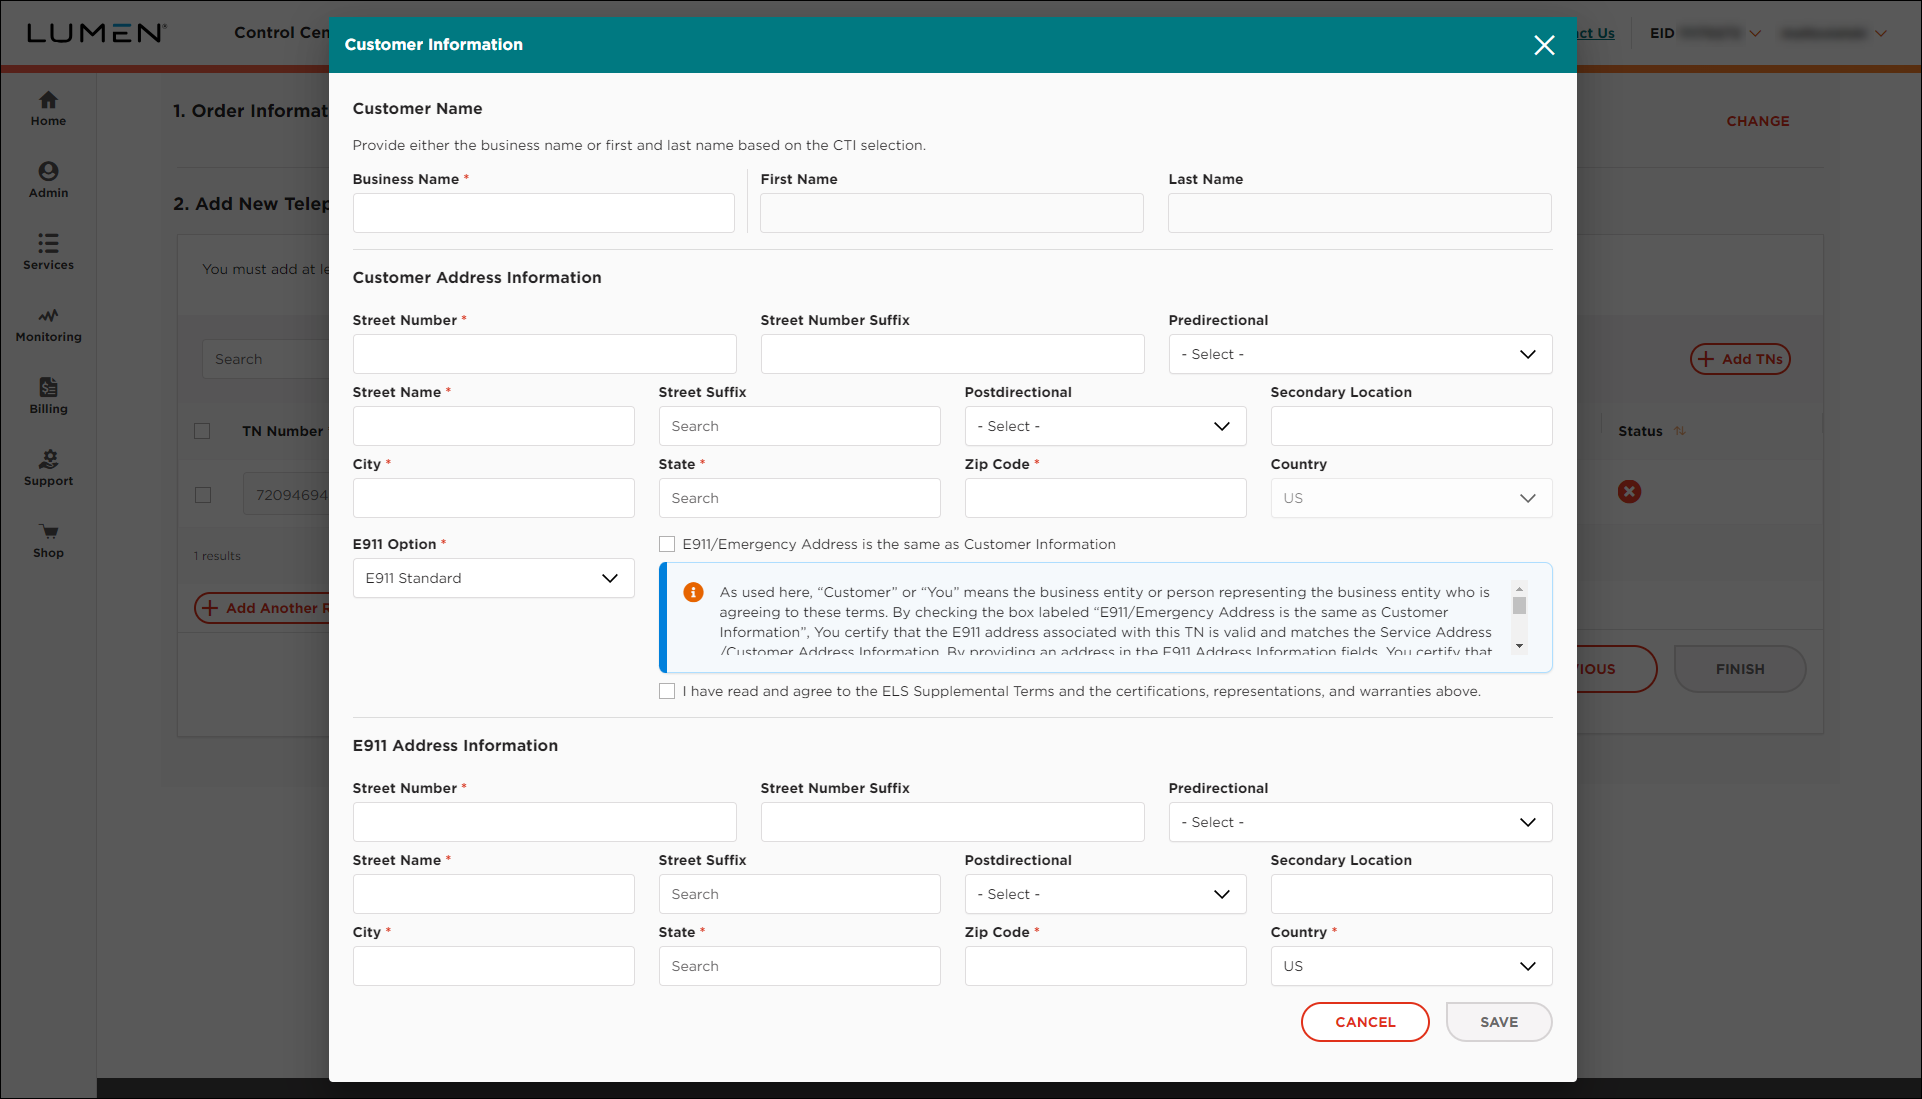
- In the Customer Name section, do one of the following:
- If the phone number(s) is for residential use, type the first and last name for the customer.
- If the phone number(s) is for business use, type the name of the business.
- If the phone number(s) is for residential use, type the first and last name for the customer.
- In the Customer Address Information field, use the fields to fill in the customer address for the phone number(s).
- In the E911 Options field, select either E911 Static or E911 Customer Provided.
- Click SAVE.
- From the Additional Details list, select CNAM & Directory Listing.
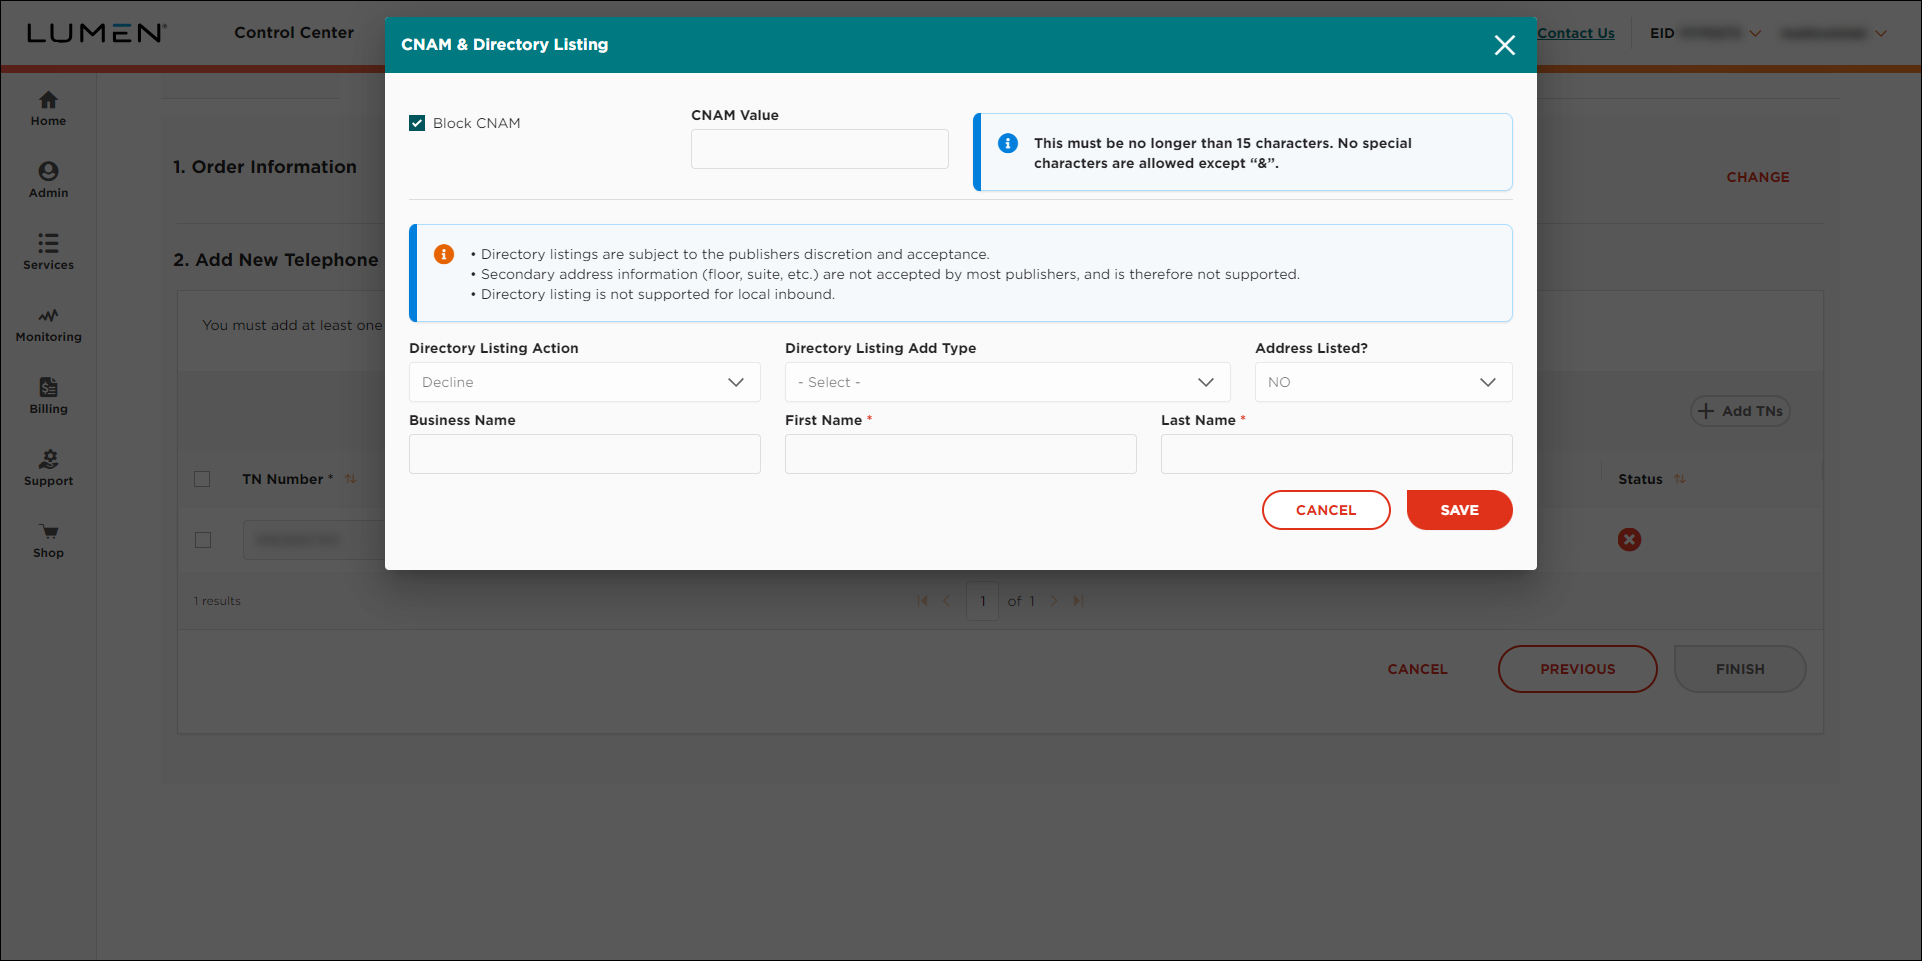
- Fill in the calling name and directory listing information (if any) for the phone number(s):
- To provide a calling name for the phone number(s), clear the Block CNAM checkbox and type the calling name in the CNAM Value field. (Otherwise, leave the Block CNAM checkbox selected.)
- To provide a directory listing for the phone number(s), do the following. (Otherwise, leave Decline selected in the Directory Listing Action field and continue with the next step.)
- From the Directory Listing Action list, select Add.
Control Center pulls the information you typed in the Customer Information window to help you get started with the directory listing.
- From the Directory Listing Add Type list, select whether you want the directory list published in Directory Assistance (DA)/411 only or also in available publications.
- From the Address Listed? list, select whether you want to include the address in the directory listing.
- Review the name and address information shown and make any changes to the name and address.
- From the Directory Listing Action list, select Add.
- When you're done, click SAVE.
If you've completed all the fields for the phone number(s), Control Center changes the icon to a icon.
- To provide a calling name for the phone number(s), clear the Block CNAM checkbox and type the calling name in the CNAM Value field. (Otherwise, leave the Block CNAM checkbox selected.)
- To add a line to the order so you can port an additional phone number(s), click Add Another Row, then repeat steps 6–16. (Otherwise, continue with step 18.)
- Click FINISH.
Control Center places your order and shows the status of your order as Created. You can now track the status of your order in Control Center.
Explore Control Center


