Creating a change request for Managed Network Services (MNS)
If you need make changes to your Lumen Managed Network Services, you can submit a change request using Control Center.
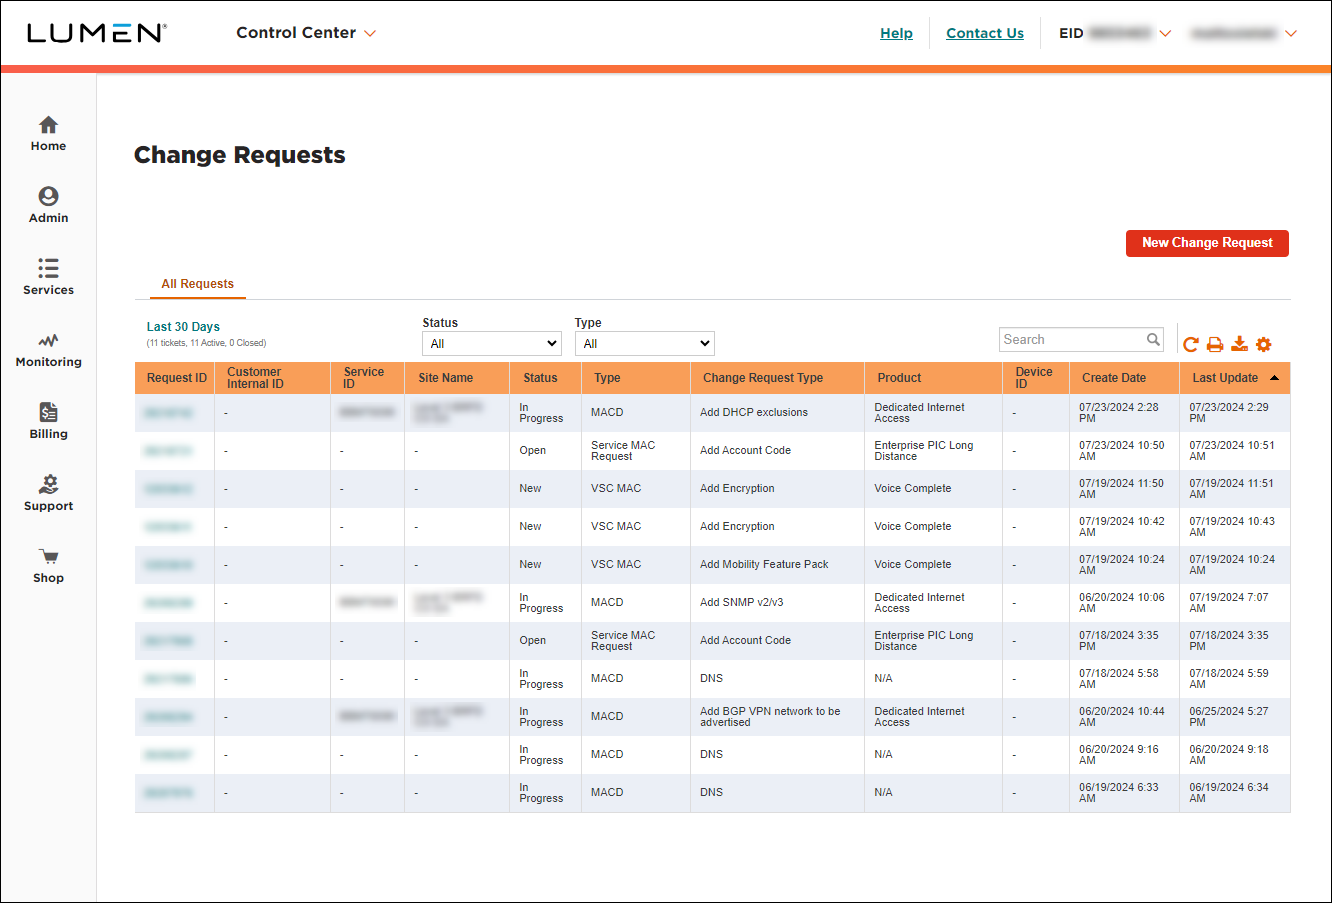
To create a change request for Managed Network Services (MNS):
- Using the left menu, click Services, click Service Requests, then click Change Requests.
Control Center lists all change requests for your organization with a status for each request.
- Click New Change Request.
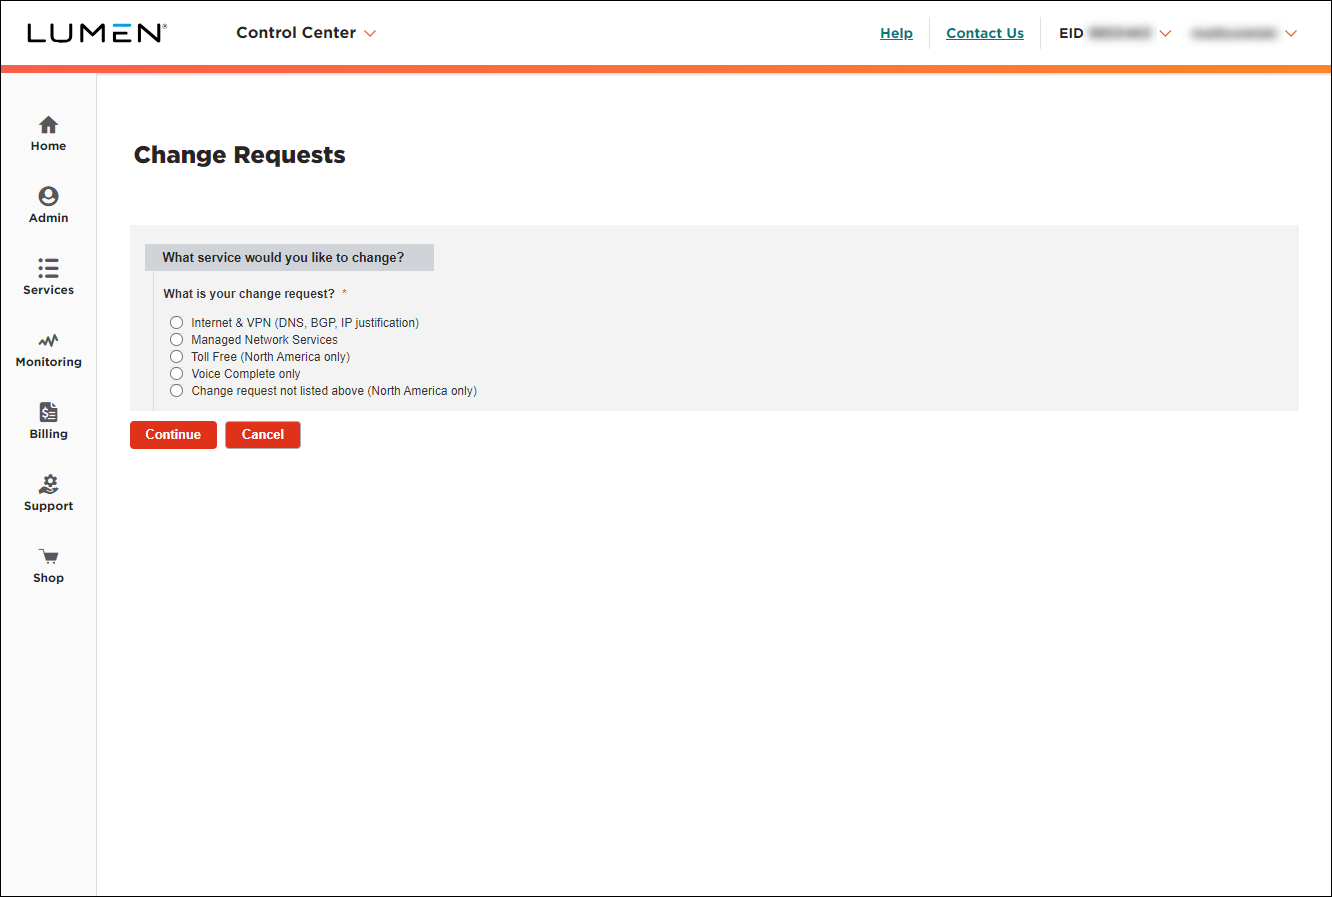
- Click the Managed Network Services (MNS) radio button.
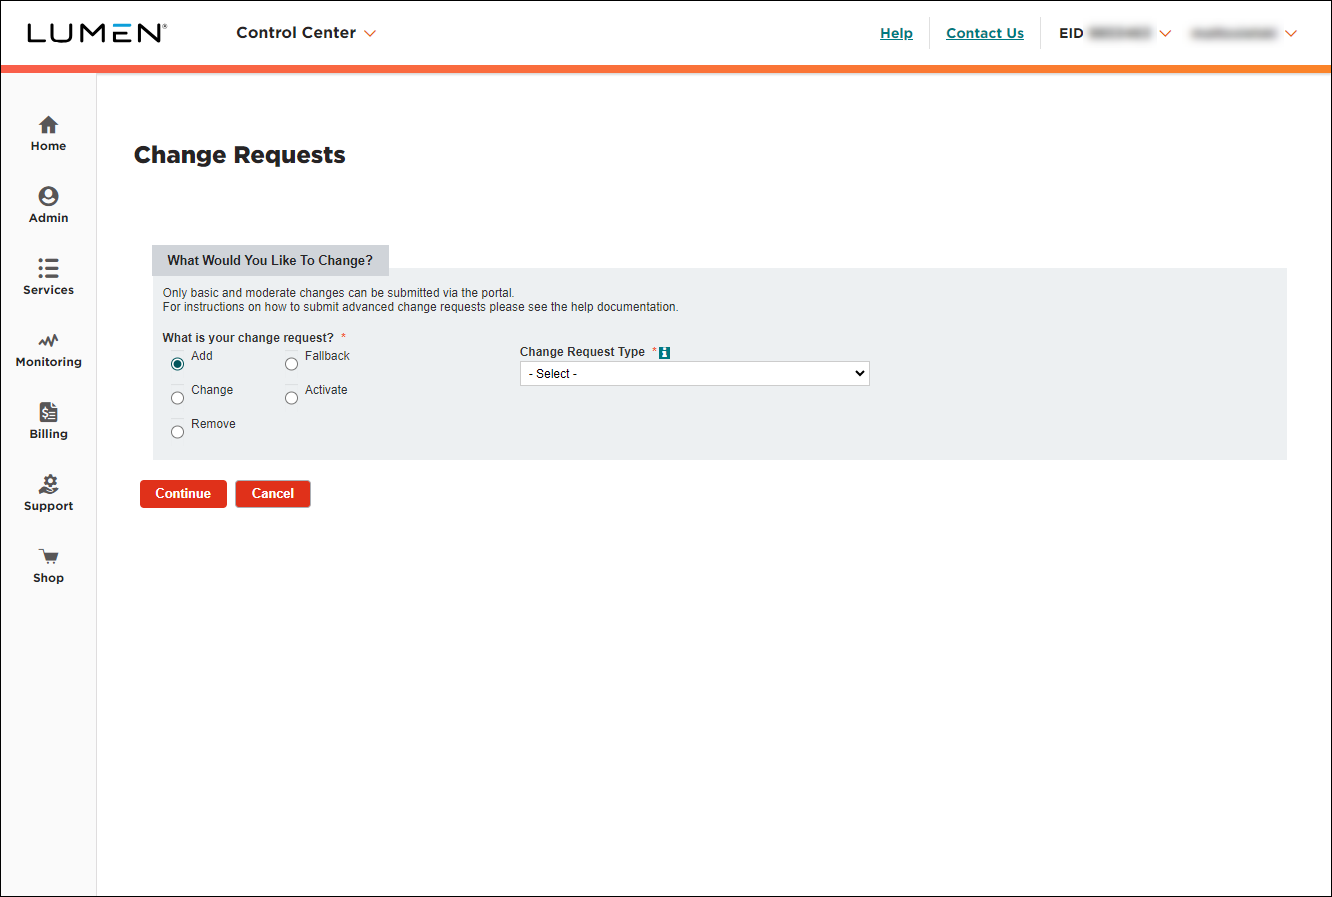
- Use the radio buttons and the lists to select the type of change you're requesting, then click Continue.
Control Center builds the change request form based on your selections.
- Fill in the first section (above the Additional Details section) with the details for your request. (Typically, you need to select the service(s) you want to apply the changes to.)
- Fill in the Additional Details section:
- If you have any additional information that would help us process your request, type it in the Additional information that could help address this change request? field.
- If you have any files to help us process your request, click Add Attachment (under Supporting files), locate and select the file(s), then click Open.
- If you need to add a tracking/ticket number or a quick note to help you track this request for your organization, fill in the Customer Internal Request ID/Description field.
- In the Requested Date and Time field, select when you'd like us to make the change. (By default, Control Center selects 24 hours from the current time.)
- If you have any additional information that would help us process your request, type it in the Additional information that could help address this change request? field.
- Fill in the Contact Information section to tell us who to communicate with for this request (and what method to use):
- Select how we should notify you of status updates for this request: Portal only; Email and Portal; or Phone, Email, and Portal.
- Verify your contact information (or update the information for the person you'd like to be contacted with updates).
- If you need to add a secondary contact for this request, click Add Secondary Contact, then type their name, phone number, and email address.
- Select how we should notify you of status updates for this request: Portal only; Email and Portal; or Phone, Email, and Portal.
- Select the checkbox acknowledging you're requesting the change on behalf of your organization and accept and charges associated with this request.
- When you're done, click Submit.
Control Center submits your change request. You can now track its status online. You can also need to update your request or close the request later as needed.
Explore Control Center


