Lumen help
Editing a configuration
A configuration tells the Lumen CDN (content delivery network) what to do when it receives requests for your content. Once you have a configuration ready, you deploy it (promote it) to either your staging or production environment. Media portal also lets you track the history for a configuration.
To edit a configuration:
- Sign in to Media portal. (Get help resetting your password)
- From the main menu, select My Services > Caching.
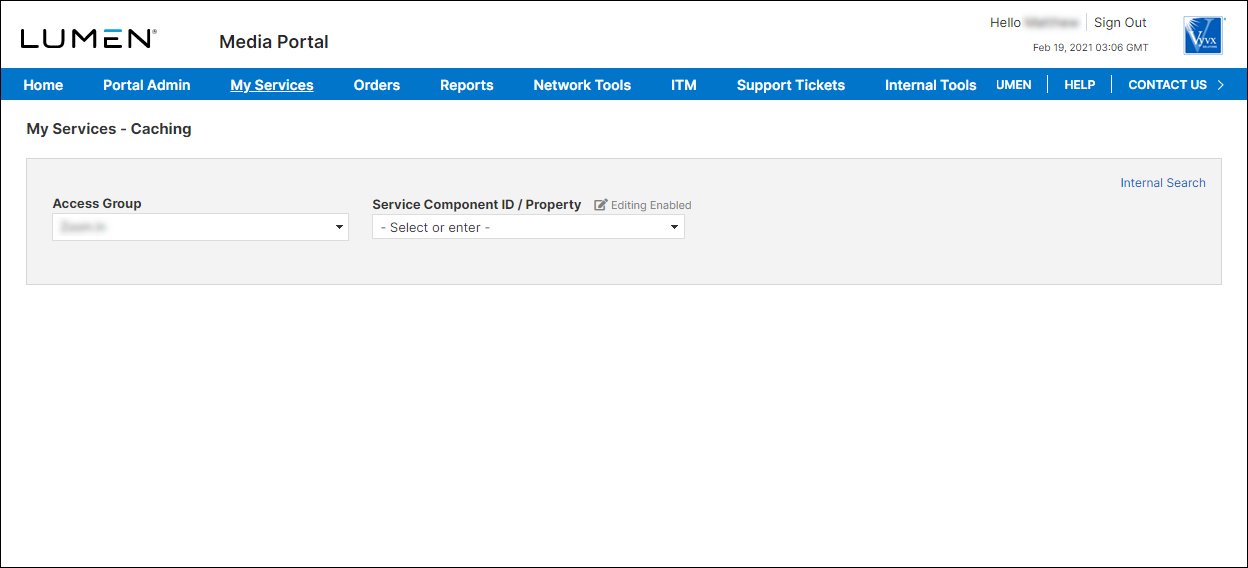
- From the lists, select the access group and SCID (service component ID) you want to work with.
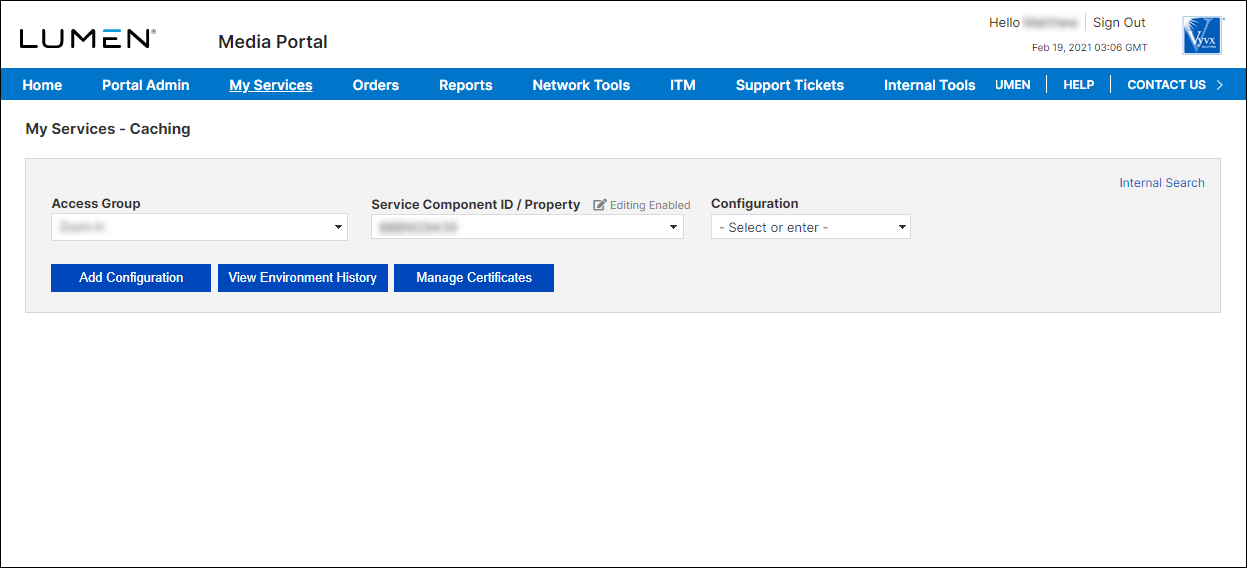
- From the Configuration list, select the configuration you want to edit.
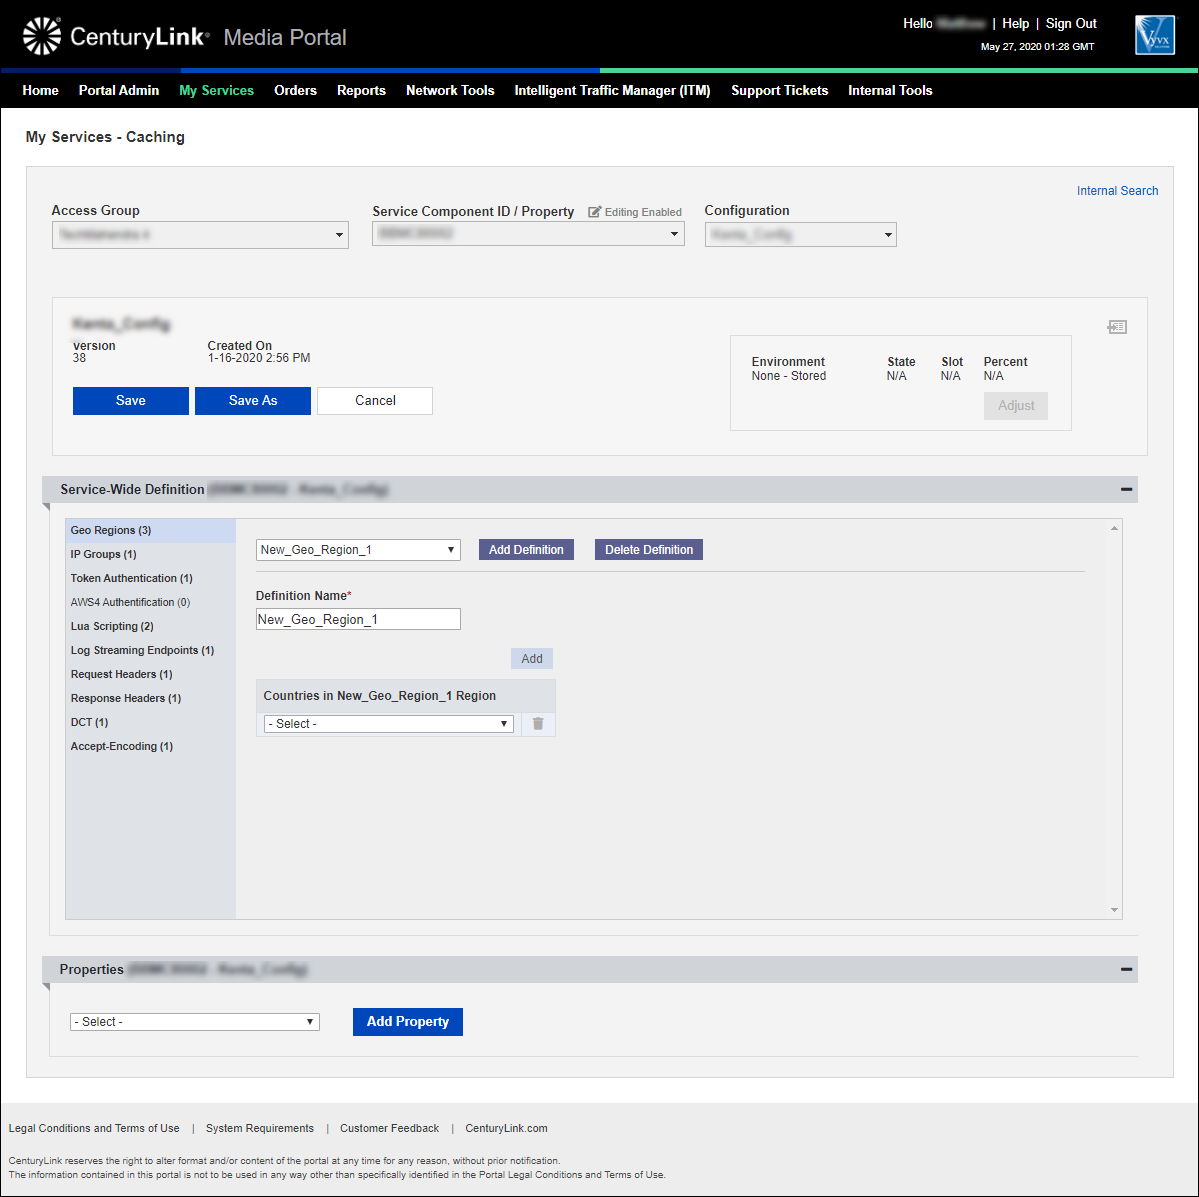
Media portal shows the details for the configuration you selected.
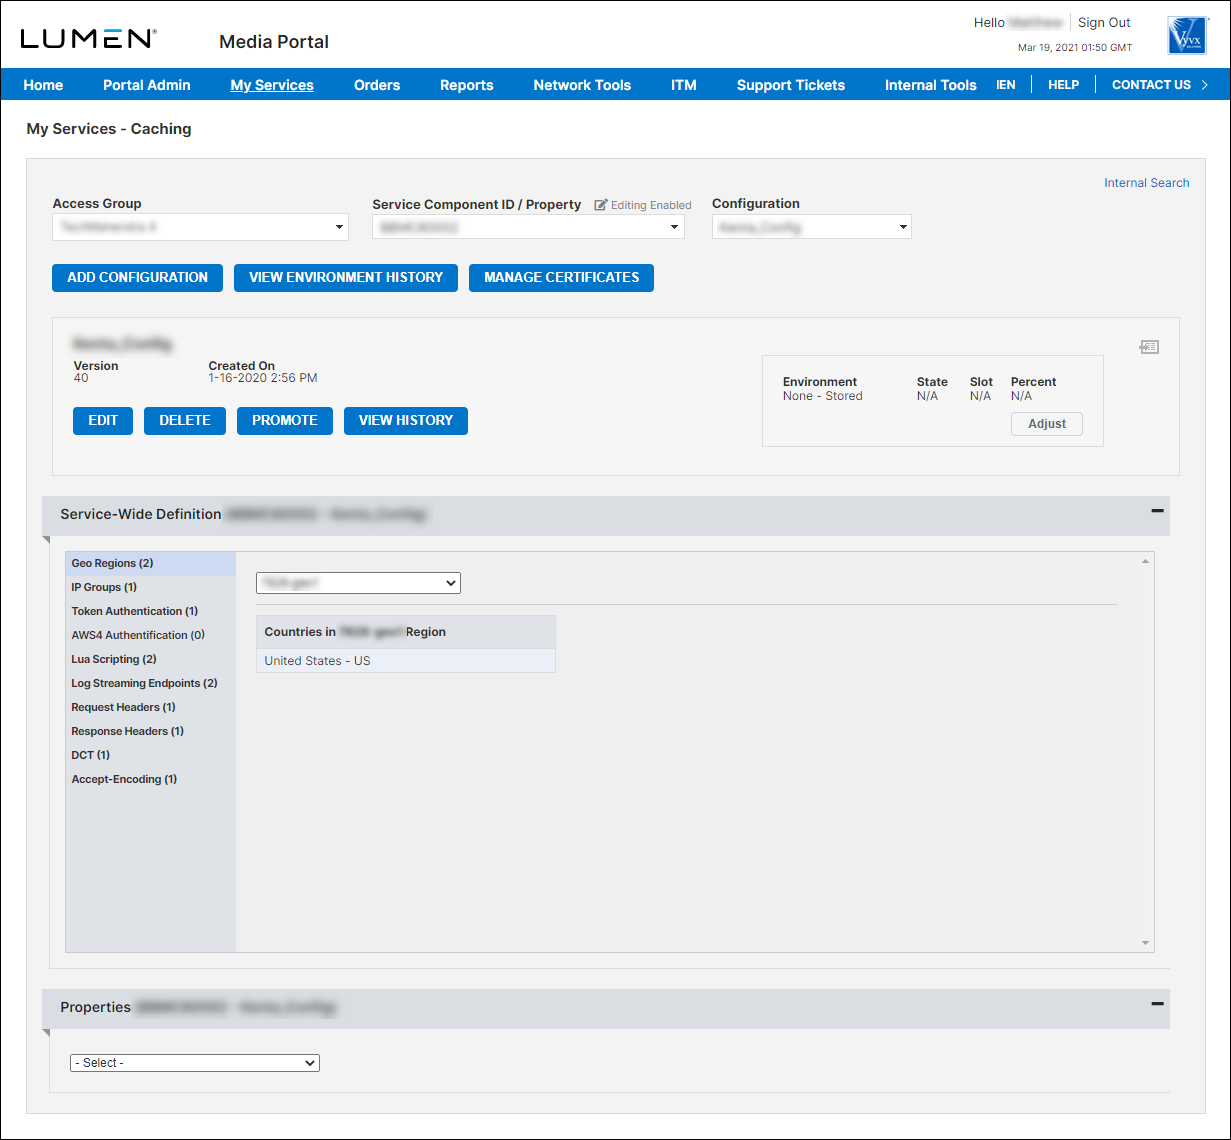
- Click Edit Configuration.
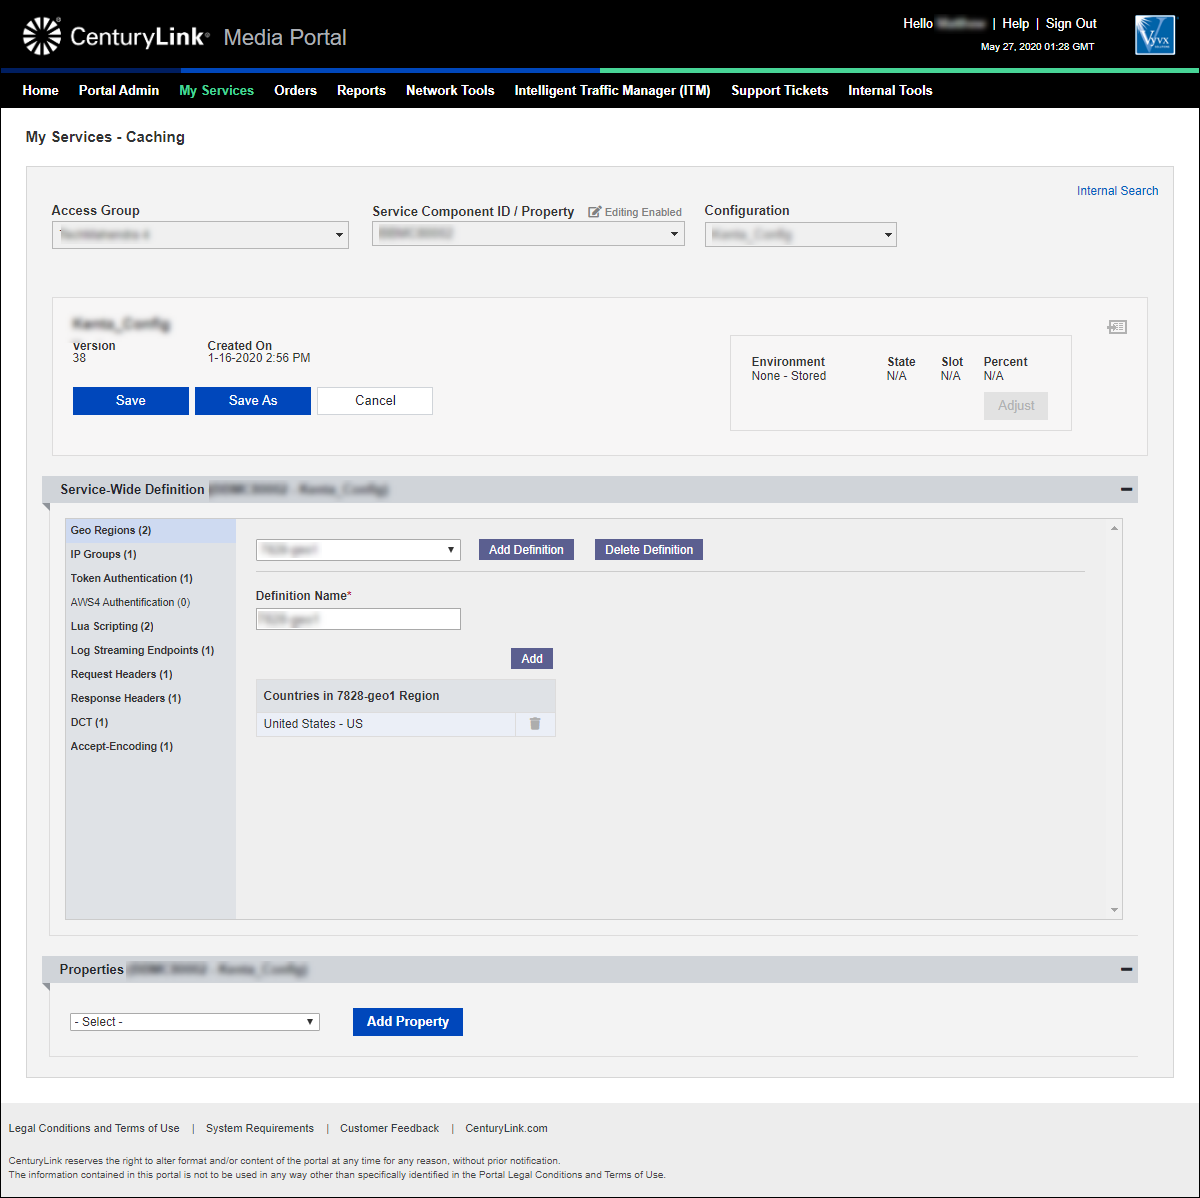
- Make your changes to the configuration.
- Do one of the following:
- To edit a definition, select it from the list and make your changes.
- To add a new definition, Add Definition, then continue with step 2.
- To delete a definition, select it from the list, then click Delete Definition.
- To edit a definition, select it from the list and make your changes.
- In the Definition Name field, type a name for the definition. (You can leave the auto-generated name or type a name more meaningful to you.)
- From the list, select a country to add to the definition. (You can also start typing the country name to save scrolling through the list.)
- To add another country, click Add, then select a country from the list.
- Repeat steps 3–4 to continue adding countries to the definition.
- In the Service-Wide Definition section, click IP Groups.
Media portal lists the IP-group definitions for the configuration (if any).
- Do one of the following:
- To edit a definition, select it from the list and make your changes.
- To add a new definition, Add Definition, then continue with step 3.
- To delete a definition, select it from the list, then click Delete Definition.
- To edit a definition, select it from the list and make your changes.
- In the Definition Name field, type a name for the definition. (You can leave the auto-generated name or type a name more meaningful to you.)
- Add IP addresses to the definition:
- In the IP Addresses in field, type an IP address you want to include in the definition.
- To add additional IP addresses, click Add, then repeat step a.
- In the IP Addresses in field, type an IP address you want to include in the definition.
Note: You can add IP addresses individually or as a range using CIDR notation.
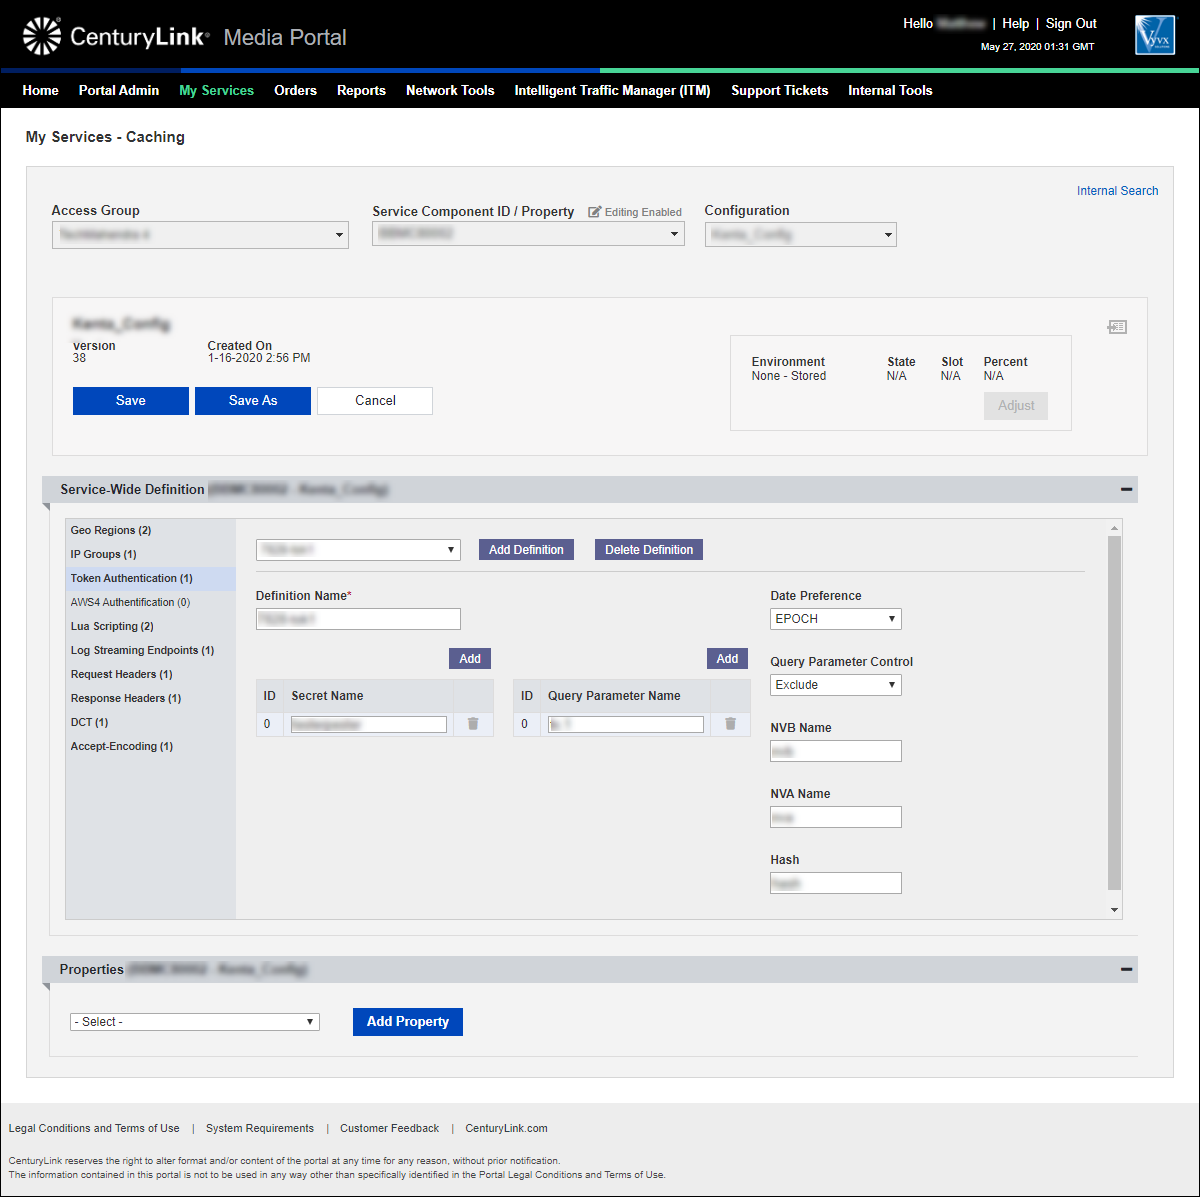
- In the Service-Wide Definition section, click Token Authentication.
Media portal lists the token-authentication definitions for the configuration (if any).
- Do one of the following:
- To edit a definition, select it from the list and make your changes.
- To add a new definition, Add Definition, then continue with step 3.
- To delete a definition, select it from the list, then click Delete Definition.
- To edit a definition, select it from the list and make your changes.
- In the Definition Name field, type a name for the definition. (You can leave the auto-generated name or type a name more meaningful to you.)
- Add secret names (up to 10) to the definition:
- Above the Secret Name section, click Add.
- Type a secret name in the field.
- To add addtional secret names, repeat steps a and b.
- Above the Secret Name section, click Add.
- Add query parameters to include or exclude from the hash to the definition:
- Above the Query Parameter Name field, click Add.
- Type a query parameter name.
- To add addtional query parameter names, repeat steps a and b.
- Above the Query Parameter Name field, click Add.
- From the Date Preference list, select your preference: EPOCH or GMT.
- From the Query Parameter Control list, select whether to include or exclude the query parameters you added.
- If you want to use a query string other than nva (not valid after), type it in the NVA Name field.
- If you want to use a query string other than nvb (not valid before), type it in the NVB Name field.
- If you want to use a query string other than hash, type it in the Hash field.
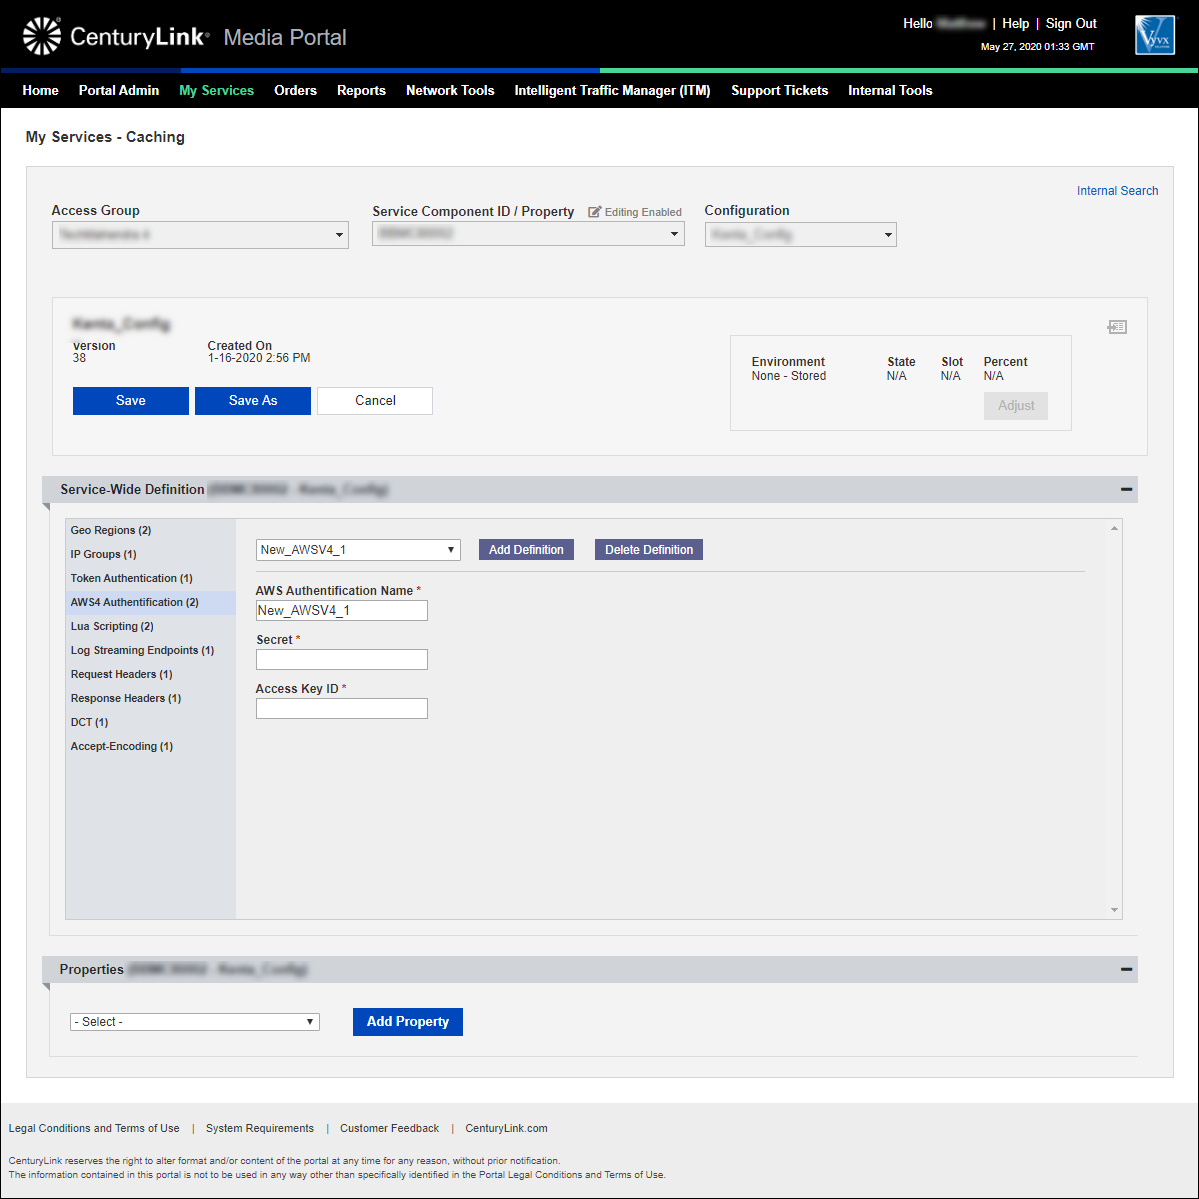
- In the Service-Wide Definition section, click AWS4 Authentication.
Media portal lists the AWS4-authentication definitions for the configuration (if any).
- Do one of the following:
- To edit a definition, select it from the list and make your changes.
- To add a new definition, Add Definition, then continue with step 3.
- To delete a definition, select it from the list, then click Delete Definition.
- To edit a definition, select it from the list and make your changes.
- In the AWS4 Authentication Name field, type a name for the definition. (You can leave the auto-generated name or type a name more meaningful to you.)
- Fill in Secret and Access Key ID fields with the information you received from Amazon when you registered.
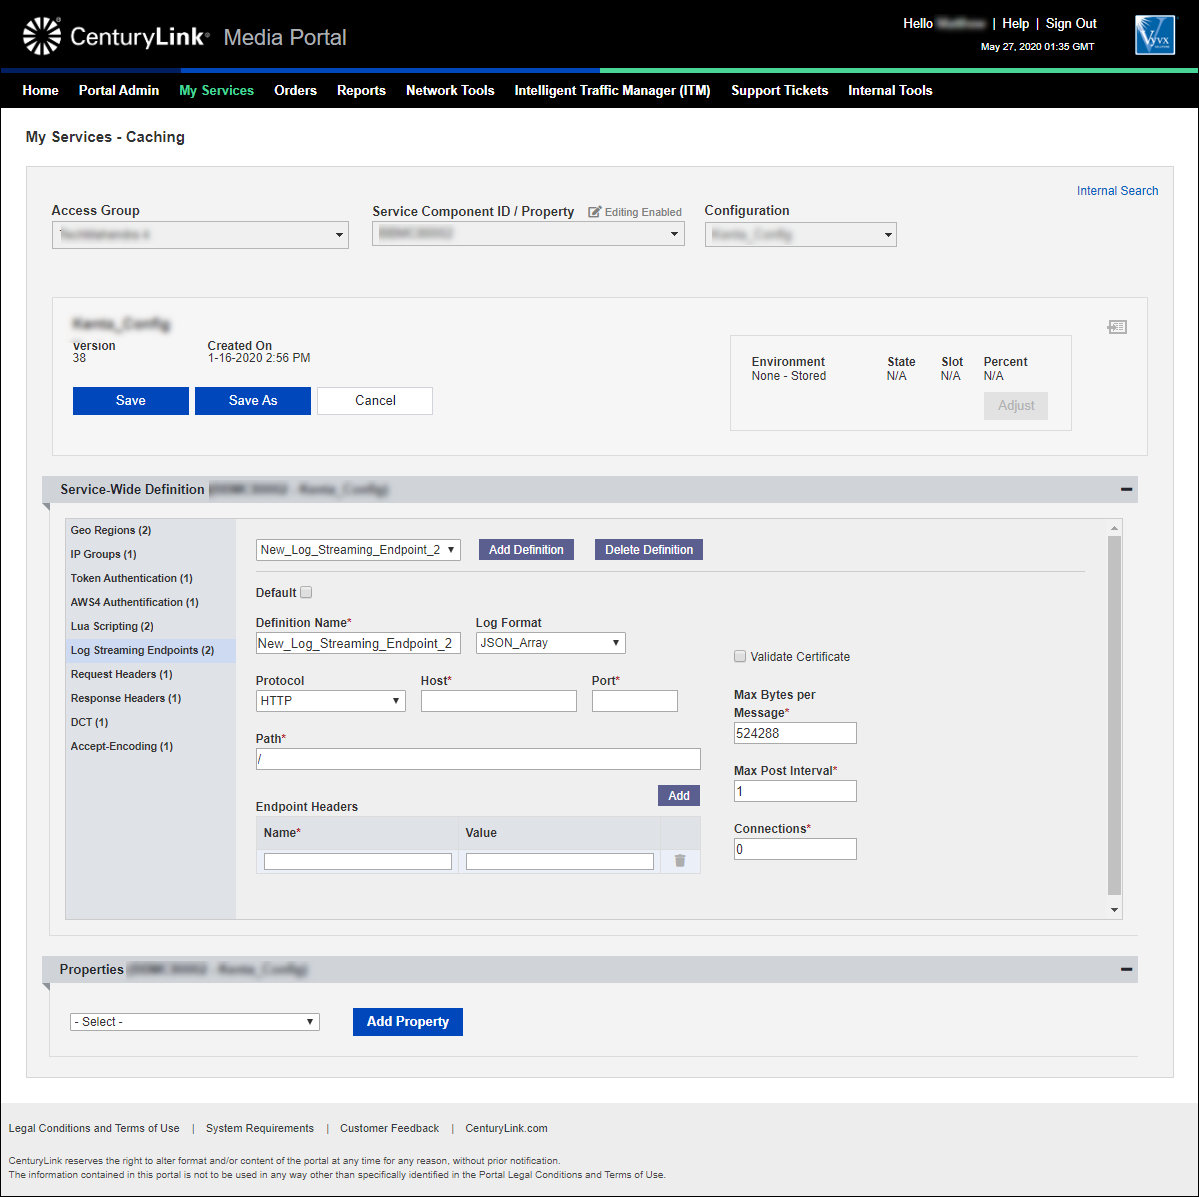
- In the Service-Wide Definition section, click Log Streaming Endpoints.
Media portal lists the log-streaming endpoint definitions for the configuration (if any).
- Do one of the following:
- To edit a definition, select it from the list and make your changes.
- To add a new definition, Add Definition, then continue with step 3.
- To delete a definition, select it from the list, then click Delete Definition.
- To edit a definition, select it from the list and make your changes.
- In the Definition Name field, type a name for the definition. (You can leave the auto-generated name or type a name more meaningful to you.)
- Fill in the information for the definition:
- From the Log Format list, select the format you want the log to use: JSON_Newline or JSON_Array.
- If you want to check whether the presented certificate CN (common name) matches the hostname, select the Validate Certificate checbox.
- From the Protocol list, select the protocol you want to use to deliver the logs.
- In the Host field, type the hostname of the remote server.
- In the Port field, type the port the remote server is listening on.
- In the Max Bites per Message field, type the maximum number of bytes of log data that will be sent in each post.
- In the Path field, type the path where the logs will be placed on the remote server.
- In the Max Post Interval field, type the maximum time the system willl hold logs until they are sent to the remote server (if the log hasn't yet reached the number of bytes you specified above).
- In the Connections field, select the number of connections.
- To create custom headers to be added to the requests, click Add, then type the name and value for the request header.
- To add additional headers, repeat step j.
- From the Log Format list, select the format you want the log to use: JSON_Newline or JSON_Array.
- In the Service-Wide Definition section, click Request Headers.
Media portal lists the request-header definitions for the configuration (if any).
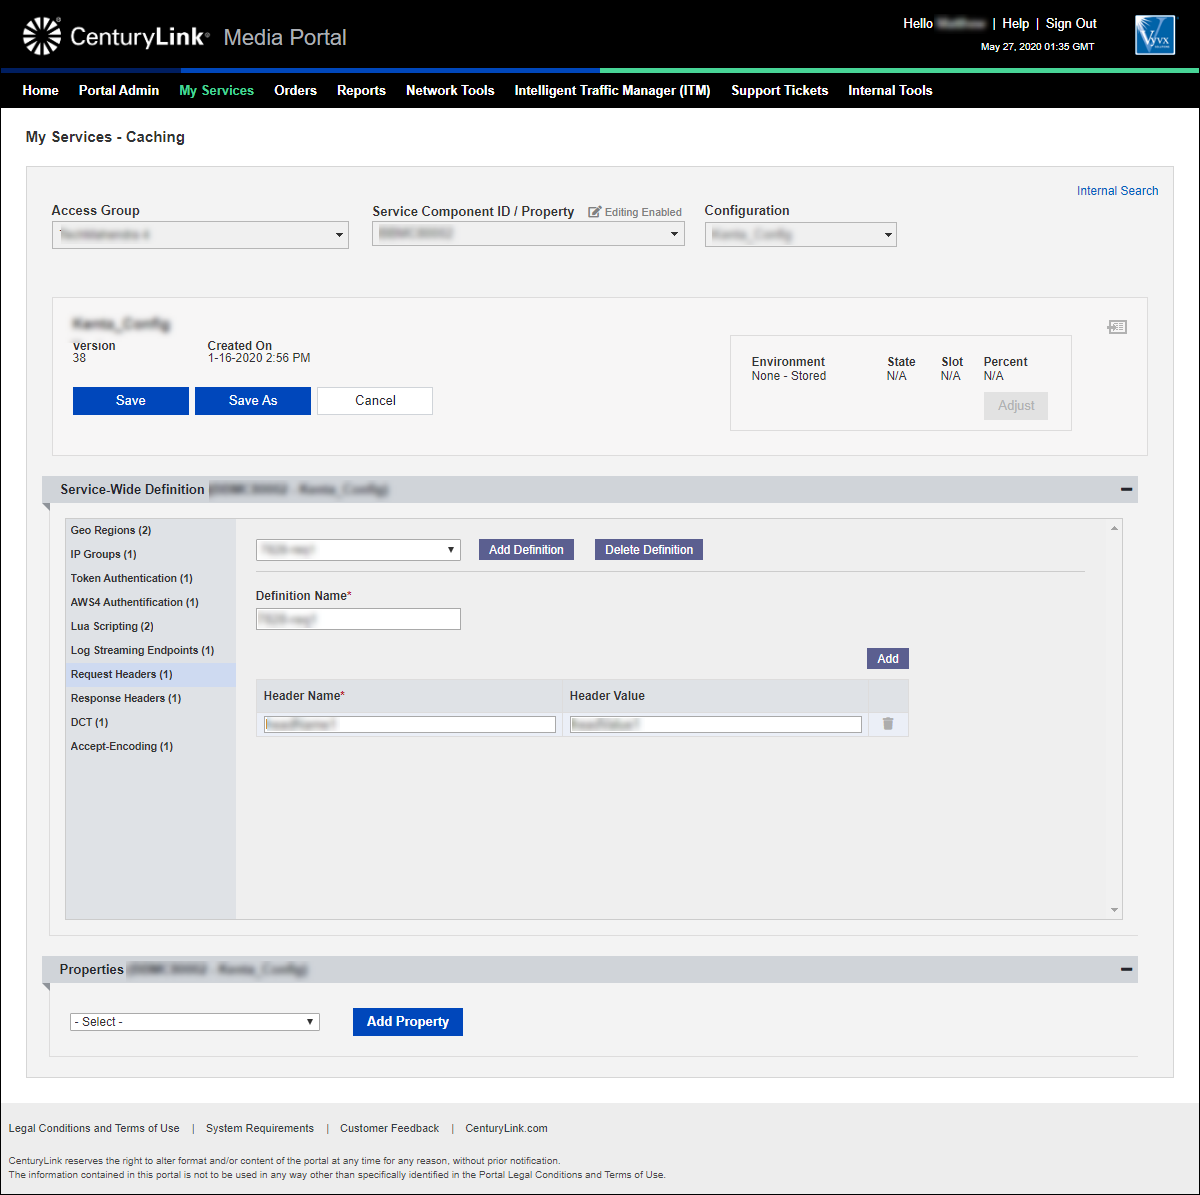
- Do one of the following:
- To edit a definition, select it from the list and make your changes.
- To add a new definition, Add Definition, then continue with step 3.
- To delete a definition, select it from the list, then click Delete Definition.
- To edit a definition, select it from the list and make your changes.
- In the Definition Name field, type a name for the definition. (You can leave the auto-generated name or type a name more meaningful to you.)
- Fill in the information for the request header:
- In the Header Name field, type the name of the request header.
- In the Header Value field, type the value to be returned for that header.
- To add additional headers, click Add, then repeat steps a and b.
- In the Header Name field, type the name of the request header.
- In the Service-Wide Definition section, click Response Headers.
Media portal lists the response-header definitions for the configuration (if any).
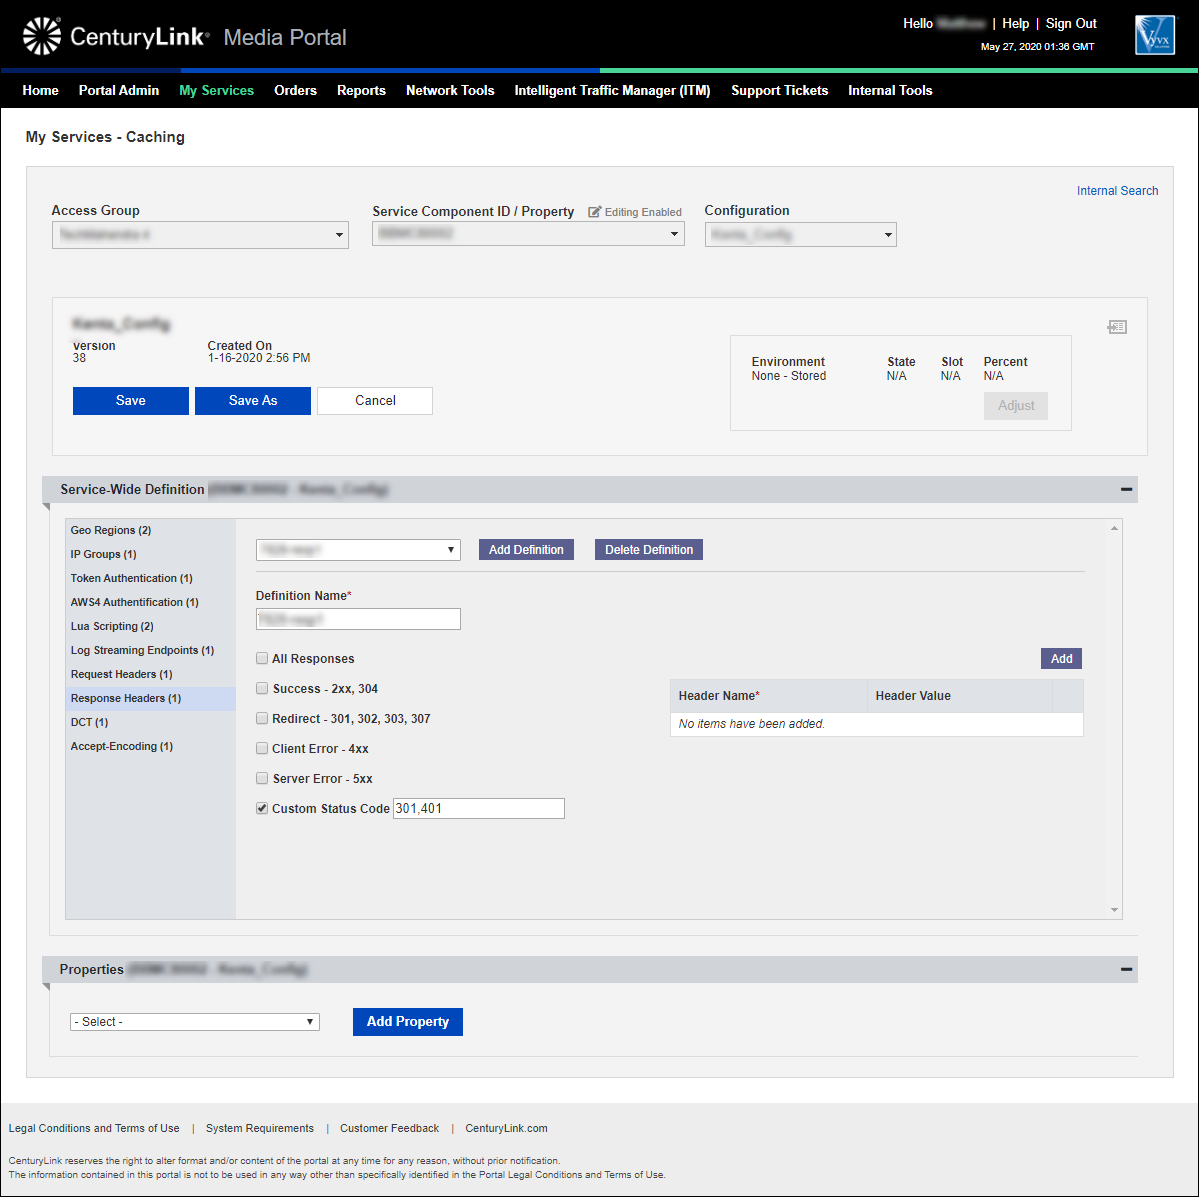
- Do one of the following:
- To edit a definition, select it from the list and make your changes.
- To add a new definition, Add Definition, then continue with step 3.
- To delete a definition, select it from the list, then click Delete Definition.
- To edit a definition, select it from the list and make your changes.
- In the Definition Name field, type a name for the definition. (You can leave the auto-generated name or type a name more meaningful to you.)
- Do one of the following:
- To specify categories of HTTP status codes you want to include in the definition, select the checkbox(es) next to those categories. You can also select the Custom Status Code checkbox and specify other status codes (separated by a comma) in the field that appears.
- To add all status codes to the definition, select the All Responses checkbox.
- To specify categories of HTTP status codes you want to include in the definition, select the checkbox(es) next to those categories. You can also select the Custom Status Code checkbox and specify other status codes (separated by a comma) in the field that appears.
- Fill in the information for the response header:
- In the Header Name field, type the name of the response header.
- In the Header Value field, type the value to be returned for that header.
- To add additional headers, click Add, then repeat steps a and b.
- In the Header Name field, type the name of the response header.
- In the Service-Wide Definition section, click DCT.
Media portal lists the DCT definitions for the configuration (if any).
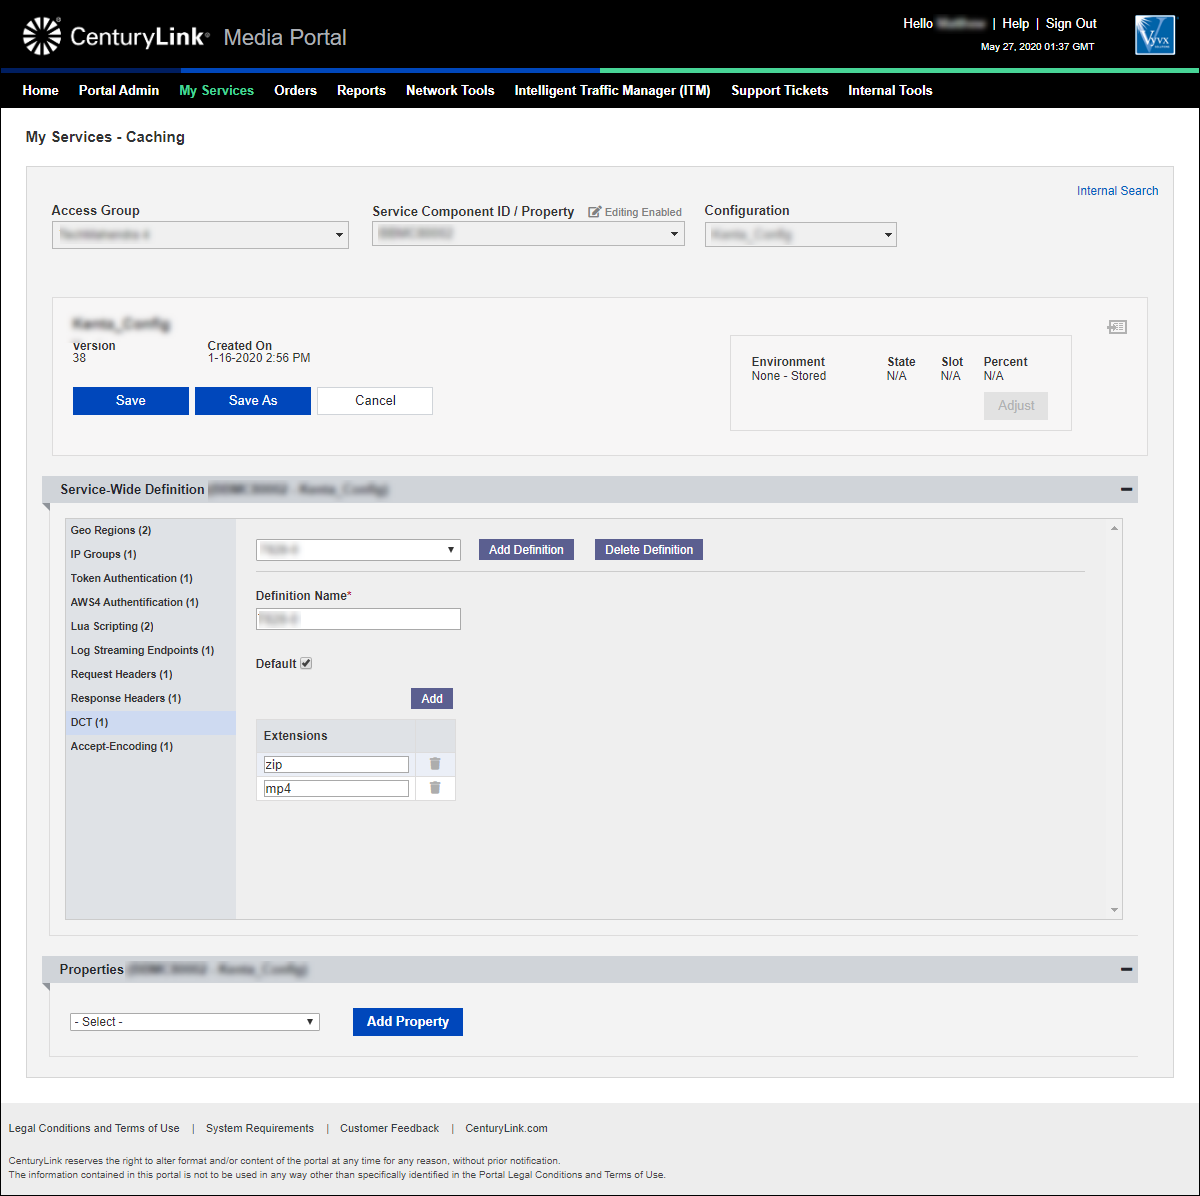
- Do one of the following:
- To edit a definition, select it from the list and make your changes.
- To add a new definition, Add Definition, then continue with step 3.
- To delete a definition, select it from the list, then click Delete Definition.
- To edit a definition, select it from the list and make your changes.
- In the Definition Name field, type a name for the definition. (You can leave the auto-generated name or type a name more meaningful to you.)
- Add extensions to the definiton that you'd like DCT applied to:
- Type an extension in the field.
- To add additional extensions, click Add, then fill in the field.
- Type an extension in the field.
- To make this definition the default DCT definition for the configuration, click the Default checkbox.
- In the Service-Wide Definition section, click Accept-Encoding.
Media portal lists the accept-encoding definitions for the configuration (if any).
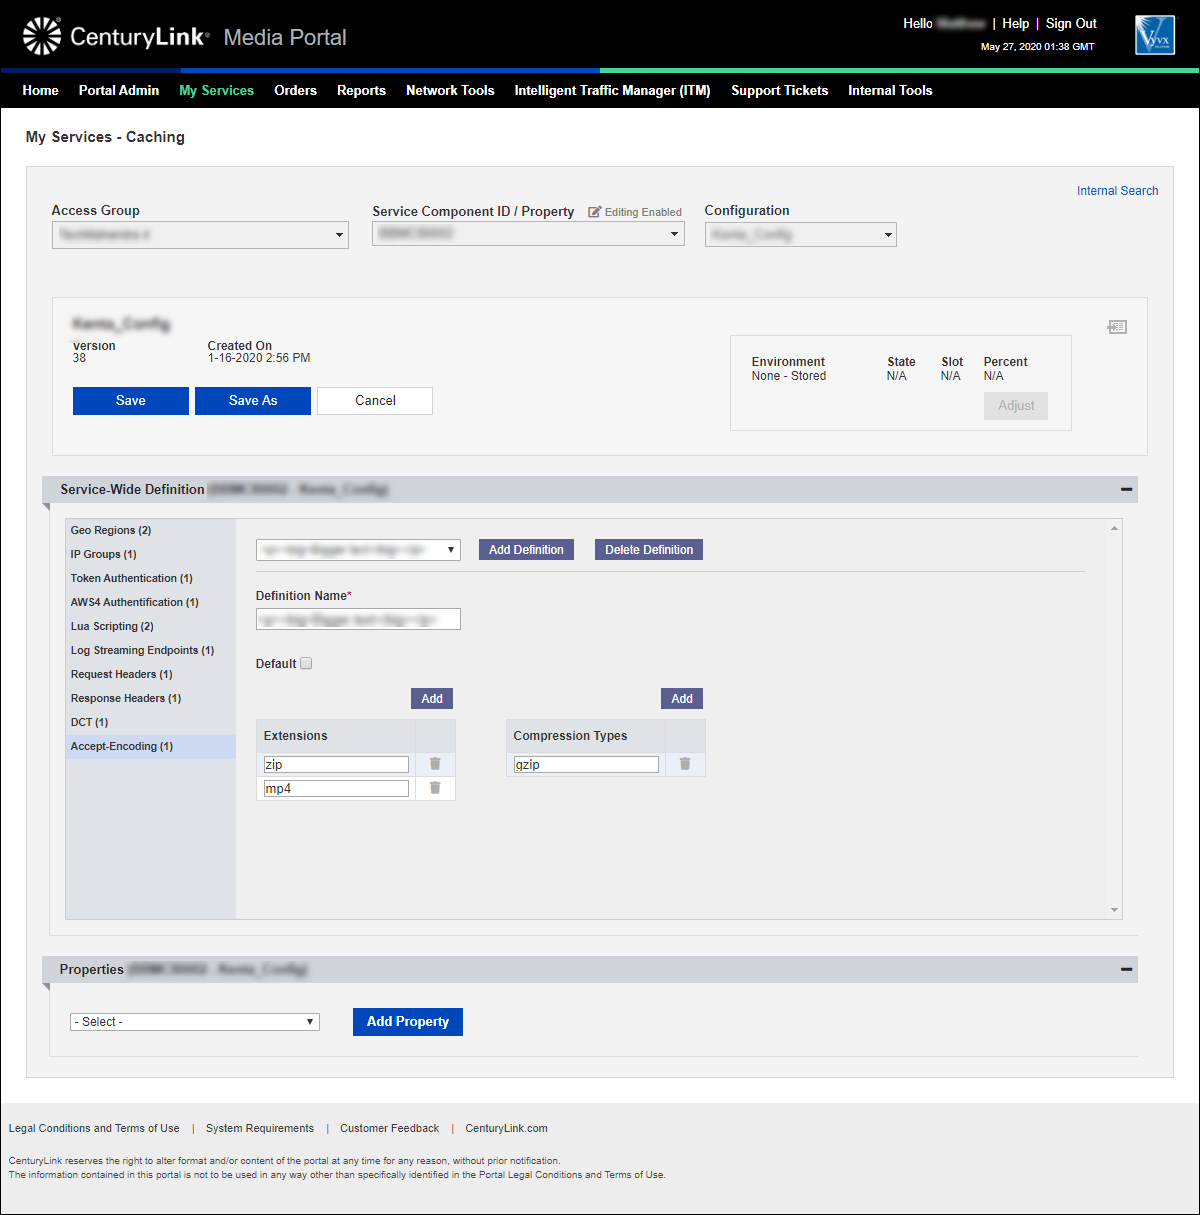
- Do one of the following:
- To edit a definition, select it from the list and make your changes.
- To add a new definition, Add Definition, then continue with step 3.
- To delete a definition, select it from the list, then click Delete Definition.
- To edit a definition, select it from the list and make your changes.
- In the Definition Name field, type a name for the definition. (You can leave the auto-generated name or type a name more meaningful to you.)
- Add extensions to the definiton:
- Type an extension in the field.
- To add additional extensions, click Add, then fill in the field.
- Type an extension in the field.
- Add compression types to the definition:
- Type the compression type in the field.
- To add additional compression types, click Add, then fill in the field.
- Type the compression type in the field.
- To make this definition the default accept-encoding definition for the configuration, click the Default checkbox.
- When you're done, click Save. (You can also save a copy of the configuration by clicking Save As.)
Media portal saves your changes:
- If you saved the configuration with the same name, Media portal adds a new version of the configuration.
- If you saved the configuration with a different name, Media portal creates that configuration and sets the version number to 1.
- If you saved the configuration with the same name, Media portal adds a new version of the configuration.
- If you're ready to push your changes to an environment, promote the configuration.
Learn more about
Media portal
Explore Media portal
Top Media portal articles
- Adding a configuration
- Adding a match rule to a configuration
- Adding a property to a configuration
- Adding a token authentication definition to a configuration
- Promoting a configuration to an environment
- Adding a new certificate
- Editing a configuration
- Adding a DCT definition to a configuration
- Viewing CName information for aliases on a configuration
- Adding an accept encoding definition to a configuration
- Topics covered on this page: